User Guide
Getting started with fleet setup, backhaul requests, and estimate requests
Getting Started: Registration & Setup

Before using Haul Monitor, your organization needs one person to register and set up your account. This first user becomes the Organization Owner and can invite colleagues once setup is complete. You'll also connect at least one load source — see Section 4: Connecting Your Load Sources, which is what gives your searches freight to find.

1
Go to the Registration Page

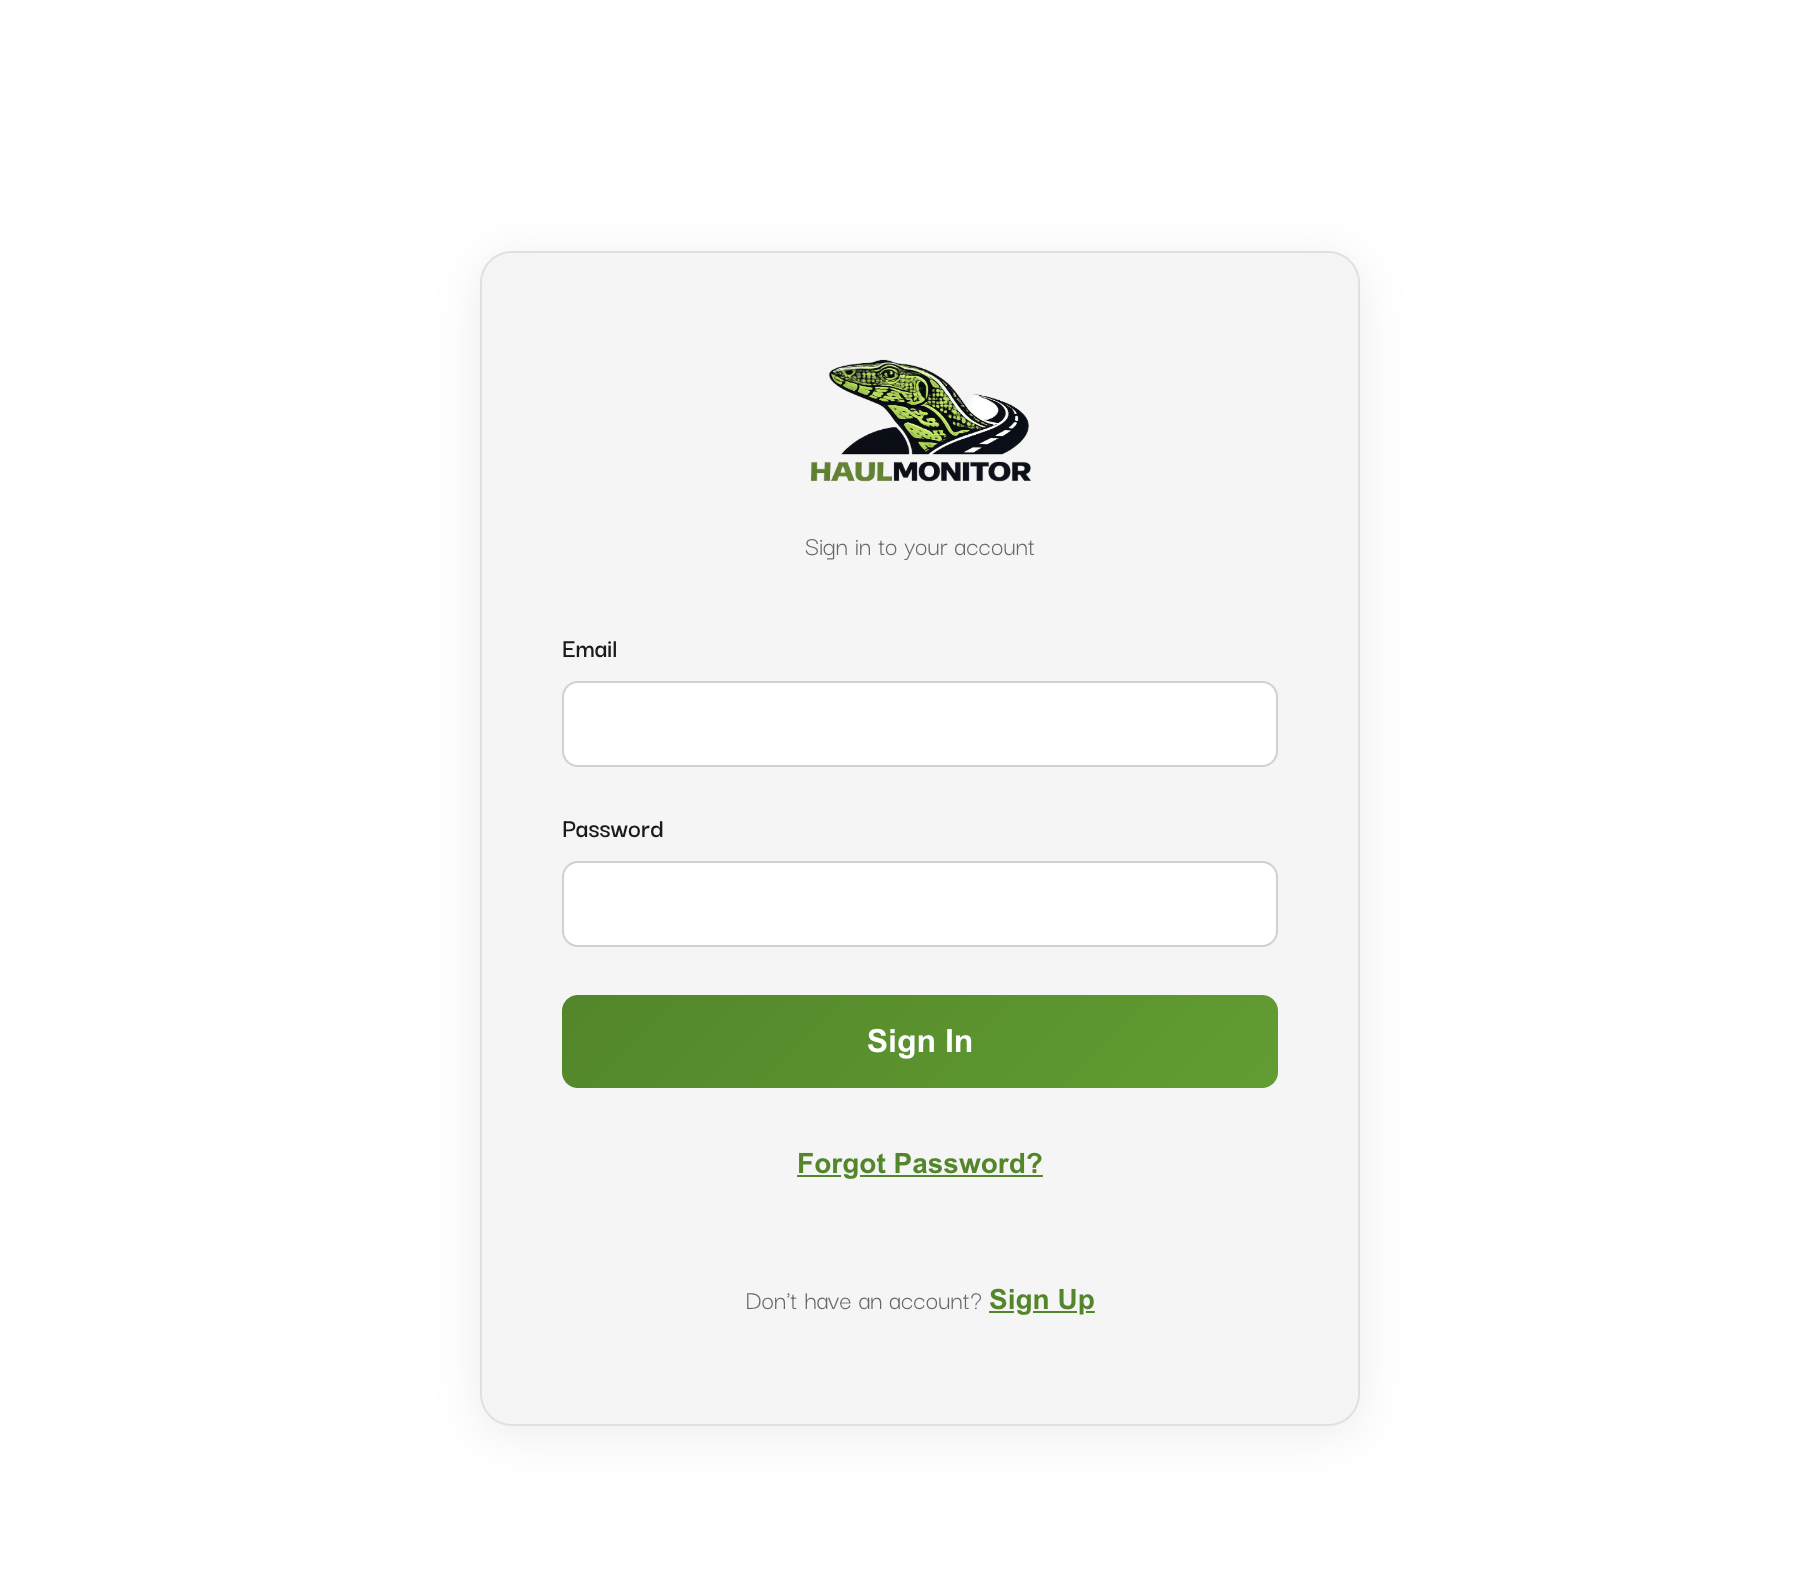
Navigate to haulmonitor.cloud/app and click Sign Up on the login screen.

Haul Monitor login screen with Sign Up link
2
Register with Your Company Email

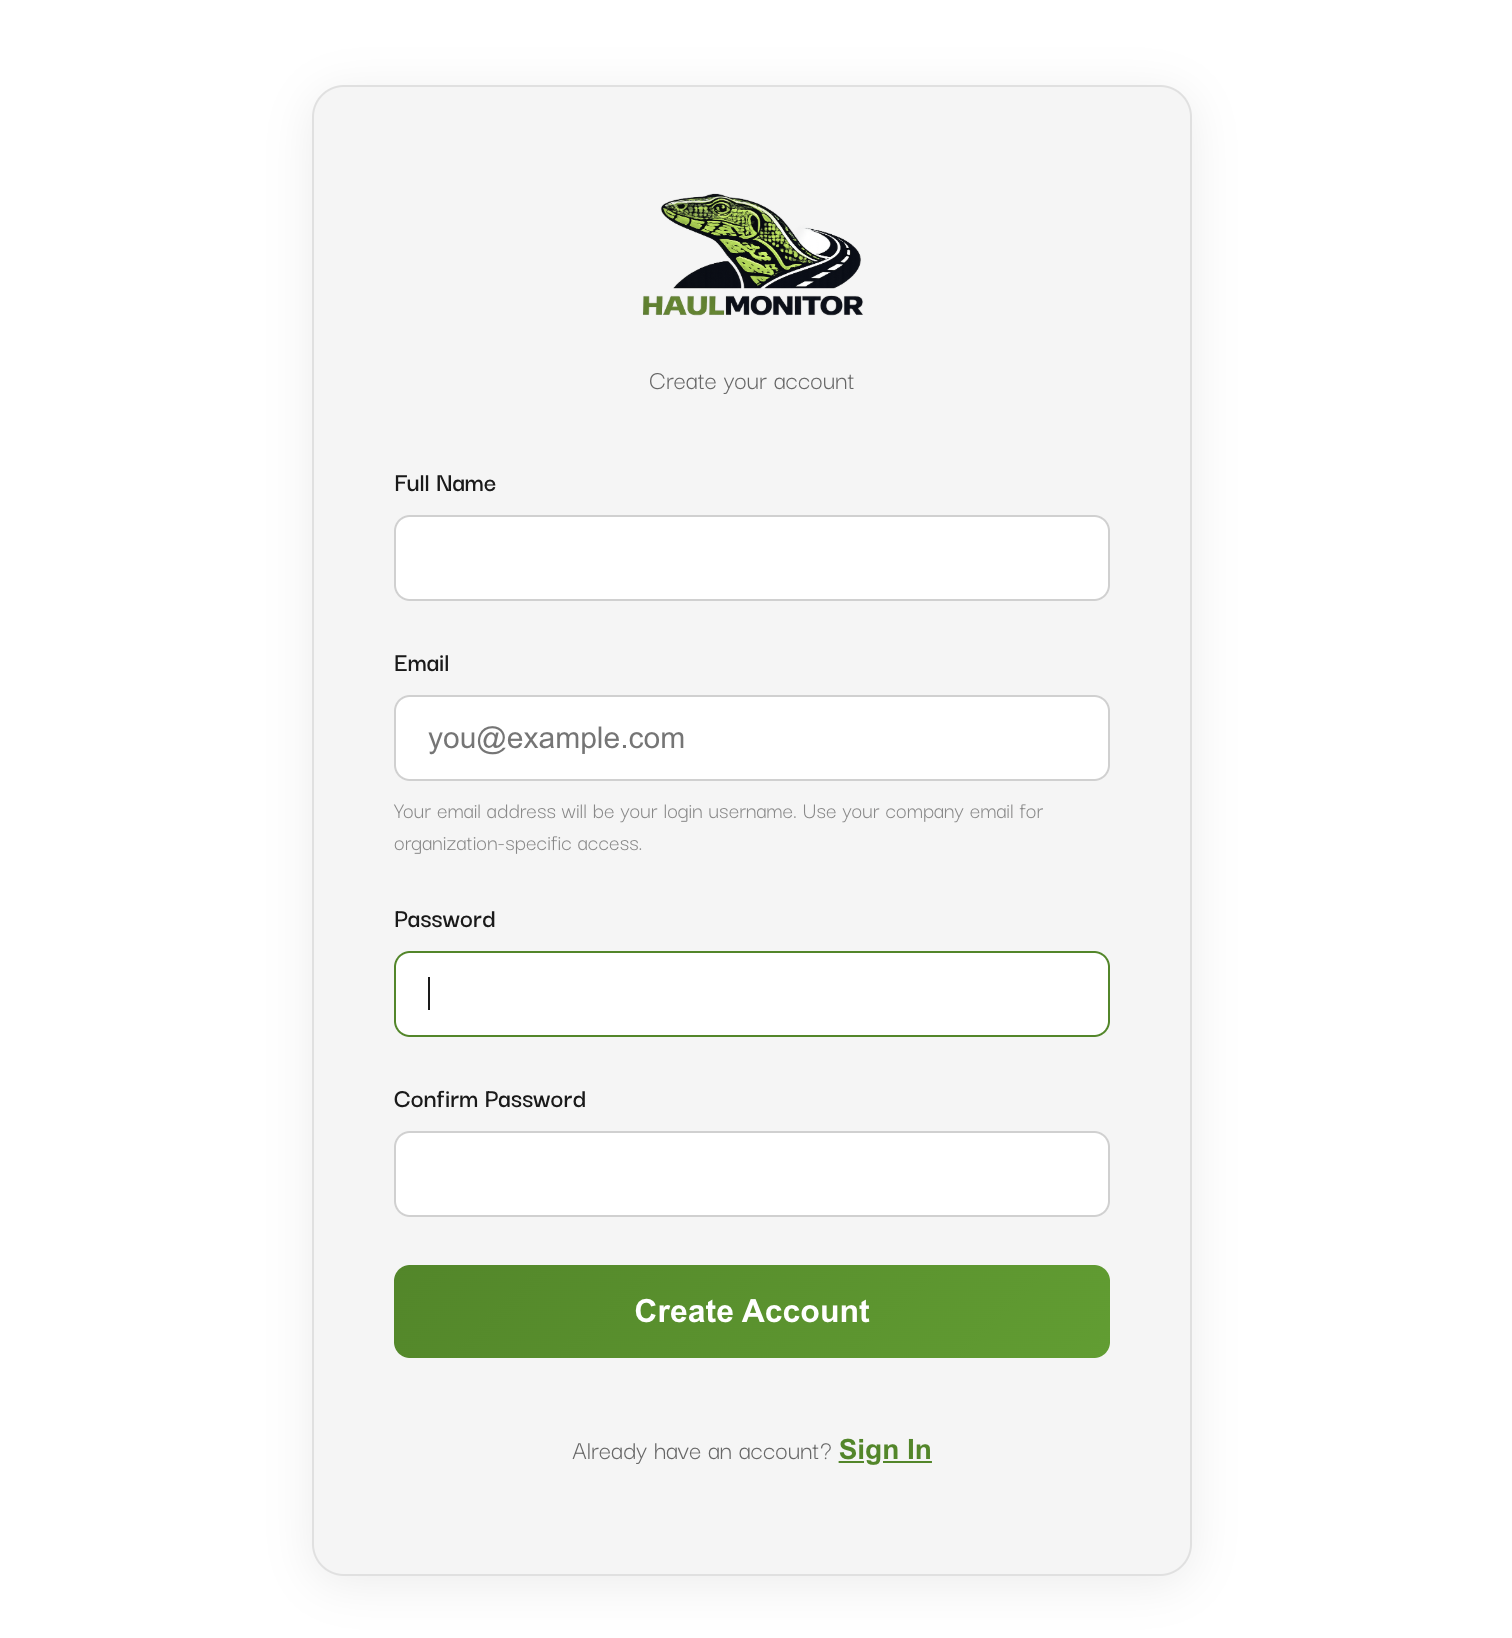
Enter your full name and your company email address. Your email address becomes your login username, so use the address you check regularly. Choose a strong password — at least 8 characters.

Registration form with name, email, and password fields
💡 Use your company email. Haul Monitor uses your email domain to group your organization. When colleagues register with the same email domain (e.g., @yourcompany.com), they'll be linked to your organization automatically.
3
Verify Your Email

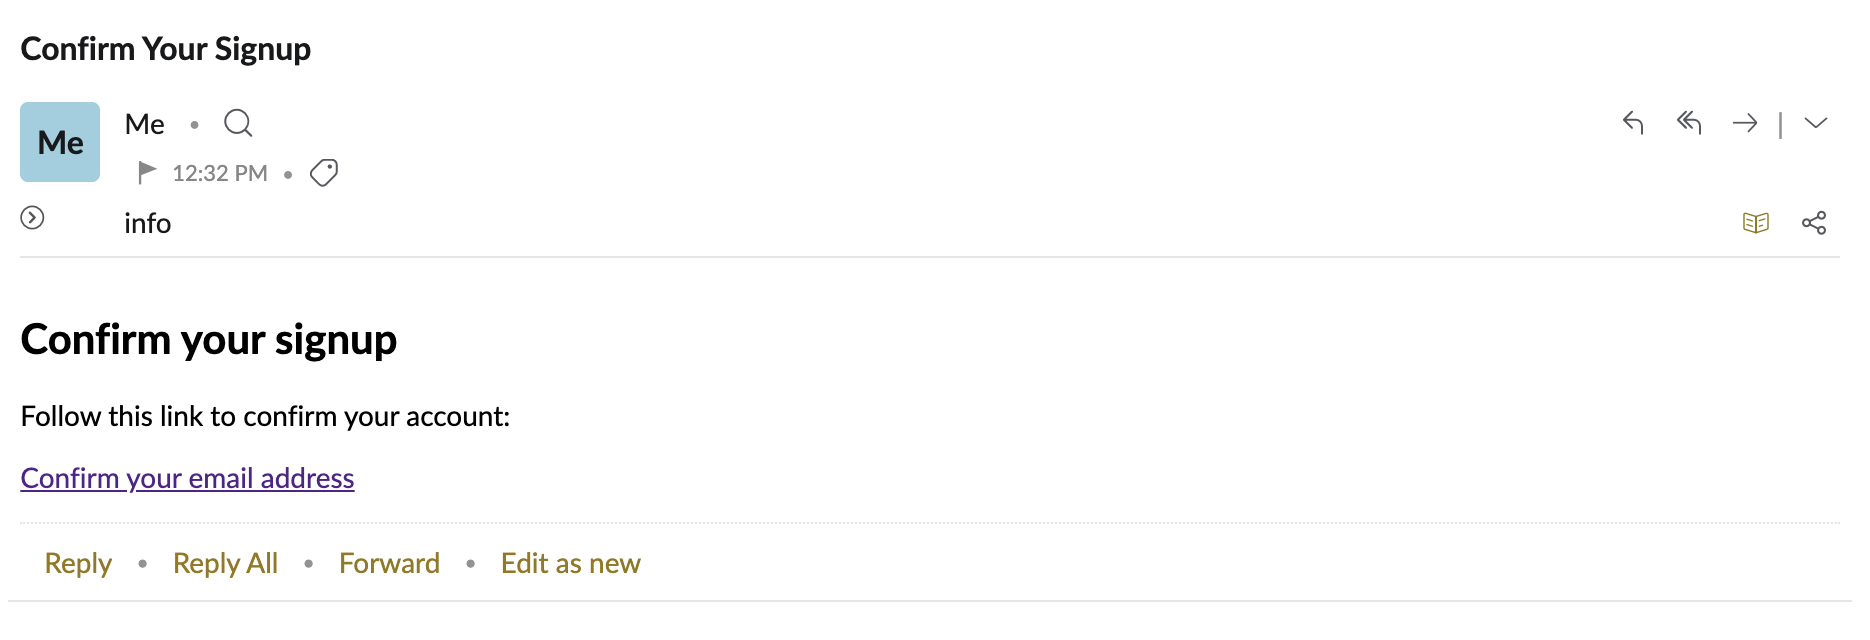
After submitting the form, check your inbox for a verification email from Haul Monitor. Click the confirmation link to activate your account. The link expires after 24 hours.

Check your email confirmation screen
⚠️ If you don't see the email within a few minutes, check your spam or junk folder. The sender address is no-reply@haulmonitor.cloud.
4
Sign In and Access Your Dashboard

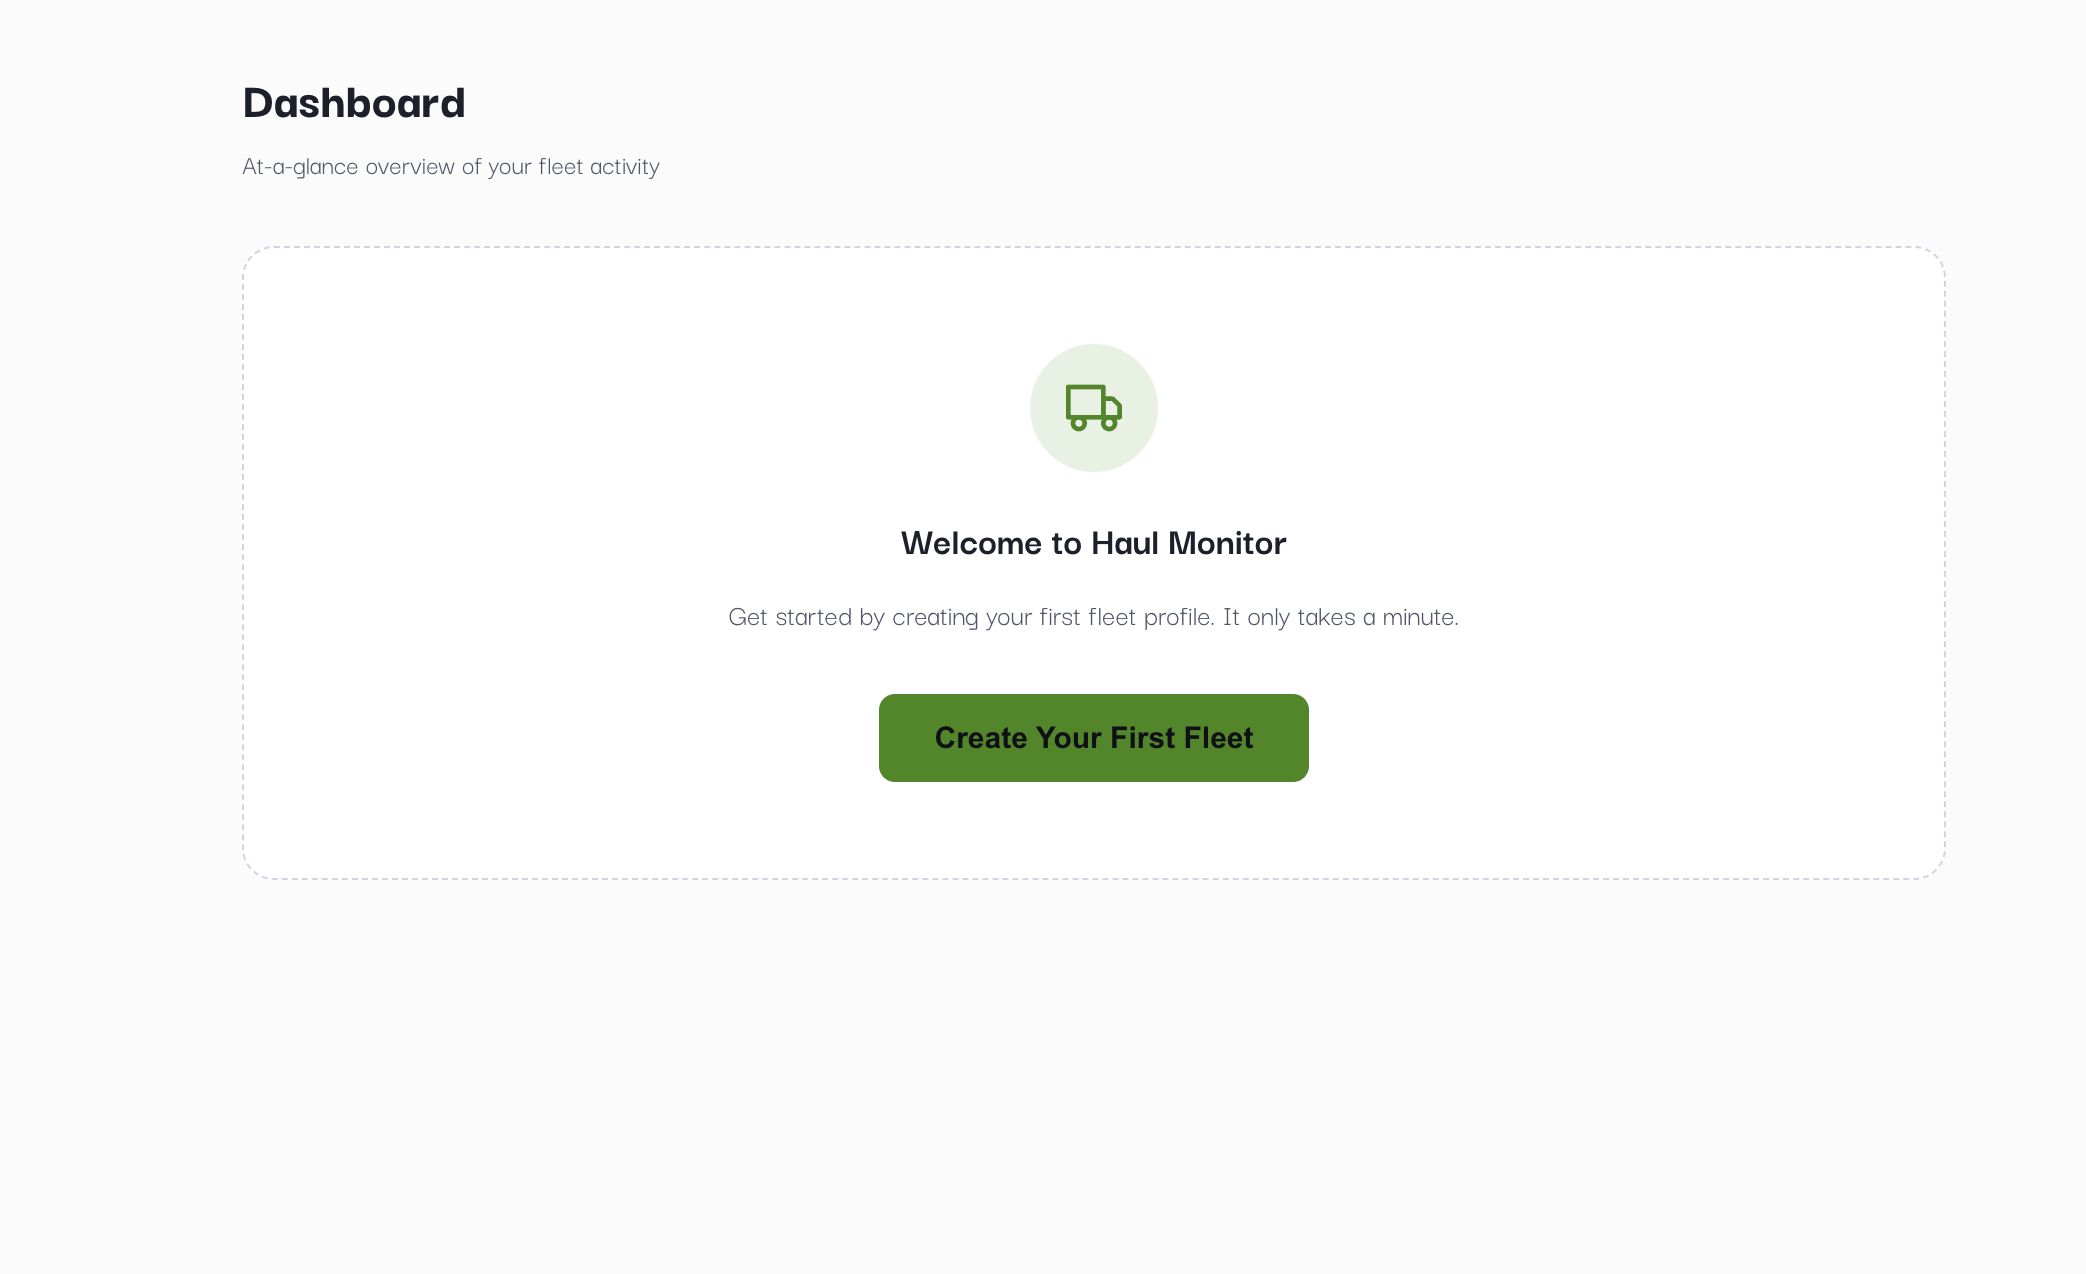
Once your email is verified, sign in at haulmonitor.cloud/app with your email and password. You'll land on your Dashboard, which is your home base for all activity. New accounts show a Get started checklist that walks you through the first four steps — create a fleet, set your rates, create a request, and run your first search — and ticks each off as you go.

Haul Monitor dashboard after first login showing the Get started checklist
5
Connect Your First Load Source

From the navigation menu go to Settings → Integrations. Haul Monitor searches four sources and you only need one to start — each one you connect widens what a search can find. You bring your own subscription to the load boards; we never resell access. Section 4 covers each one in detail — this is the short version to get you searching.

Settings then Integrations, showing Truckstop, 123Loadboard, Direct Freight and Arrive Logistics with their connection status
Truckstop
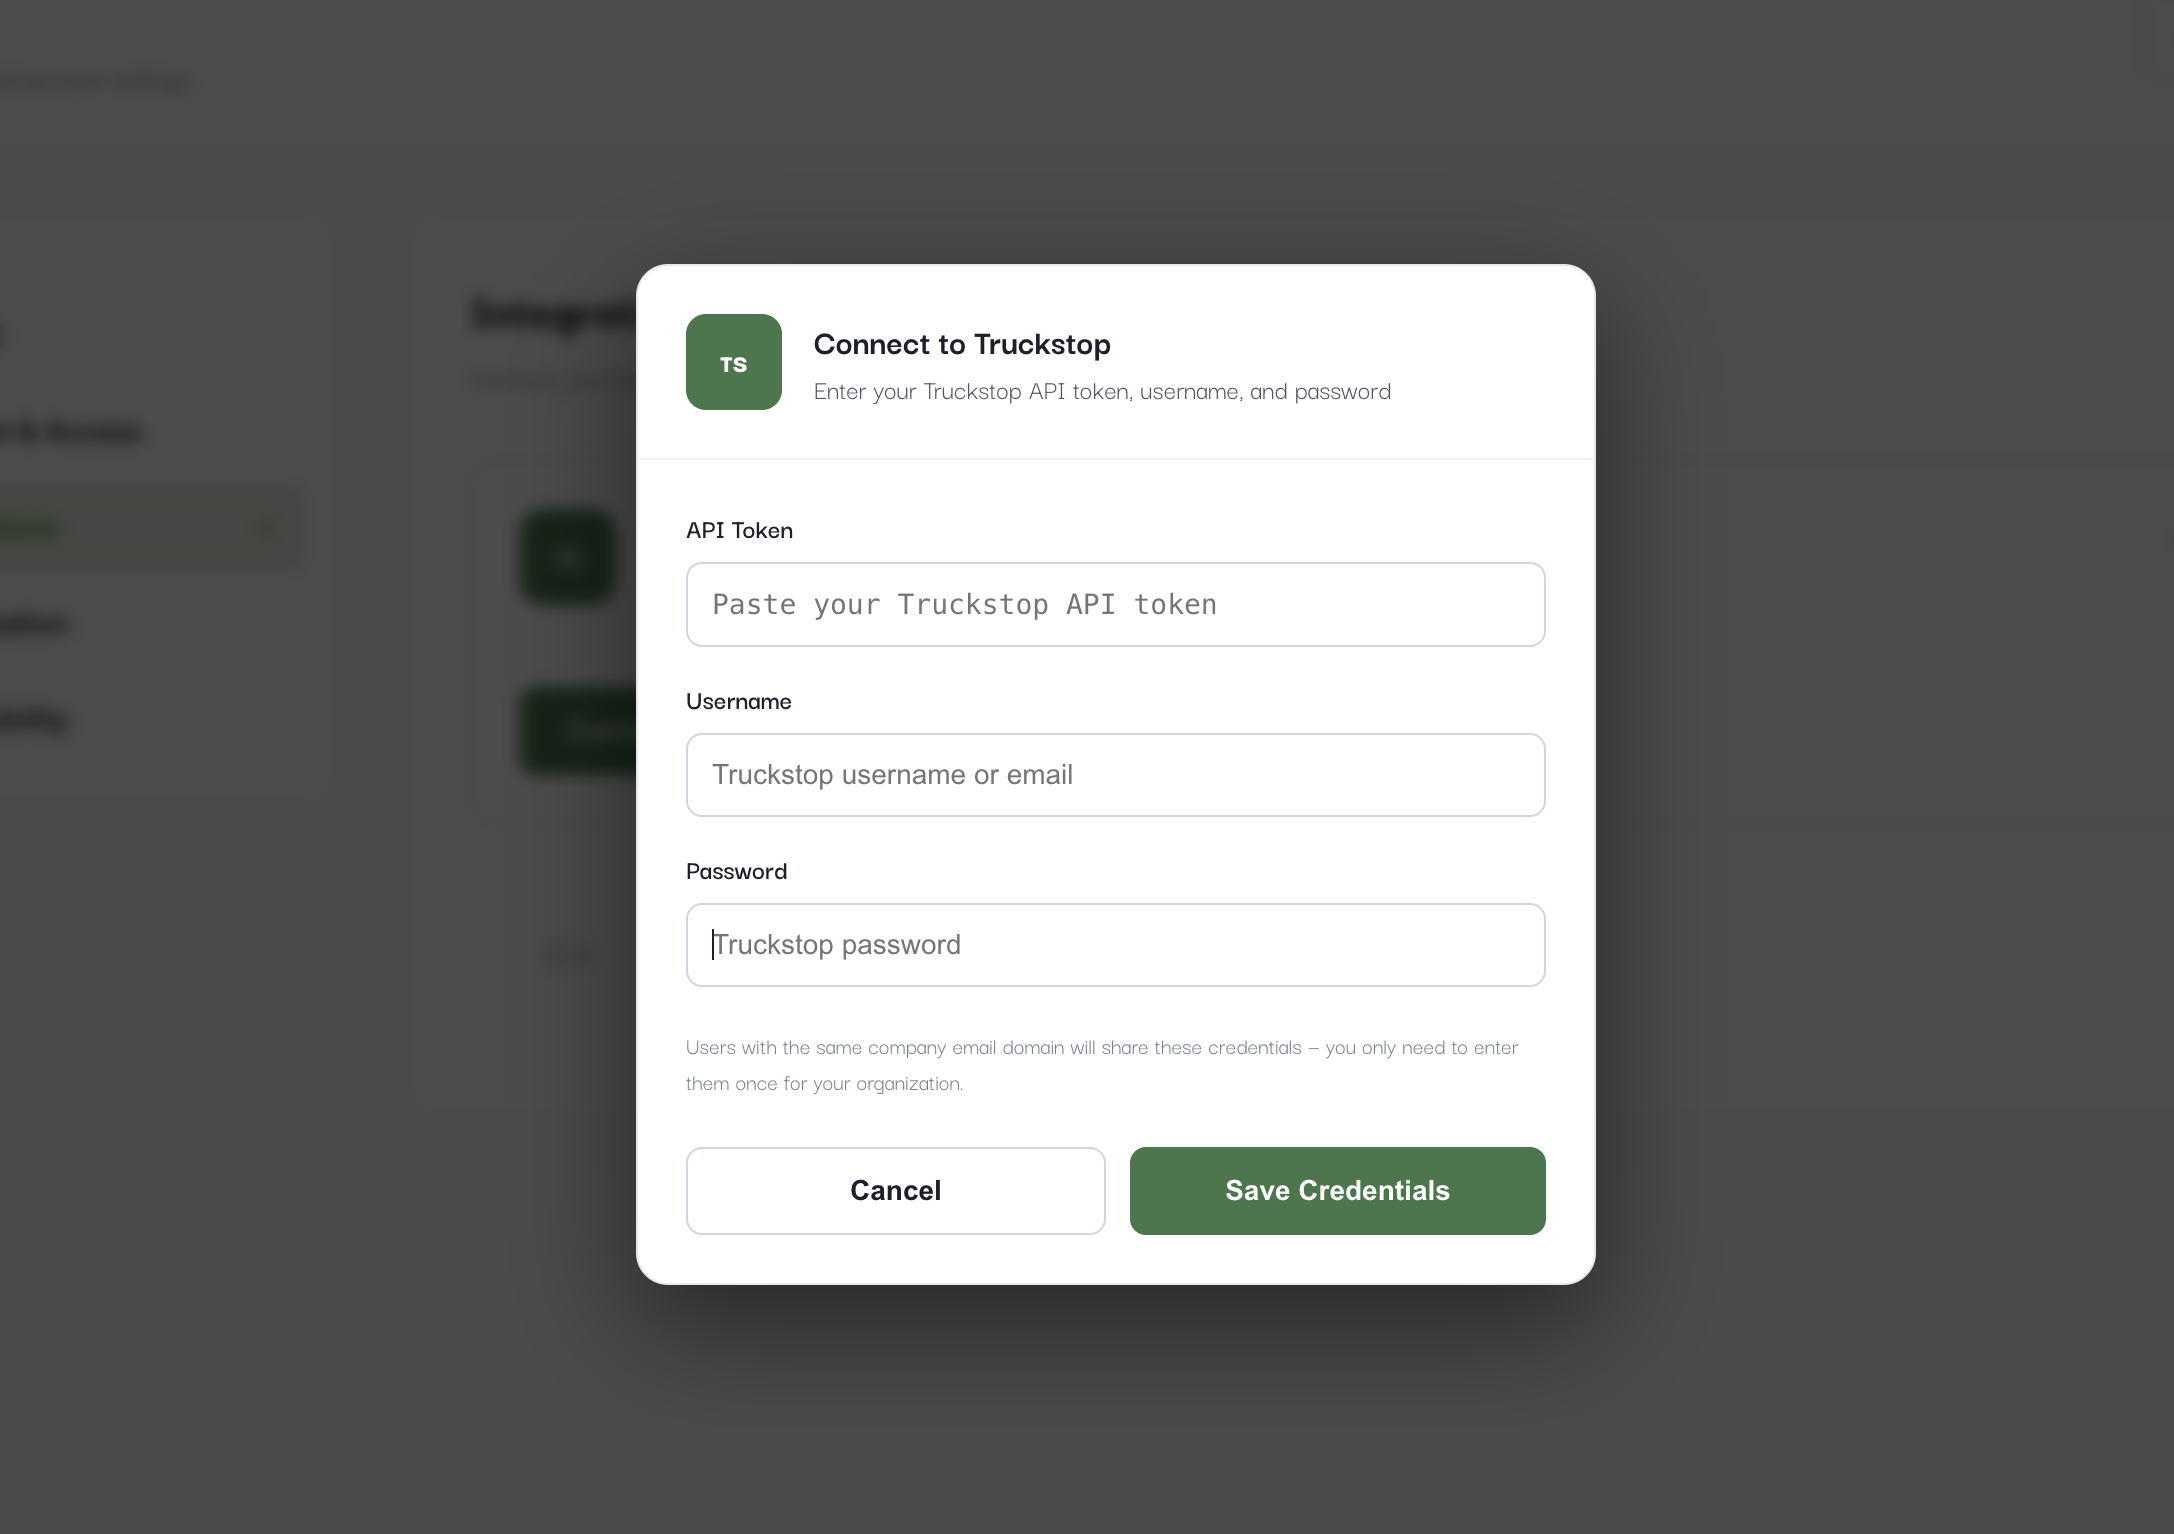
Click Connect and enter your Integration ID. Haul Monitor checks it with Truckstop straight away, so you know immediately whether it is valid.
123Loadboard
Click Connect and you are sent to 123Loadboard to sign in and authorize Haul Monitor. Your login stays with 123 — we never see your password. Each person connects their own 123 account.
Direct Freight
Click Connect and enter your Direct Freight username and password. Your subscription determines which load data you can access.
Arrive Logistics
A broker rather than a board, and enabled for your organization centrally — nothing to set up. Arrive’s own freight appears in your results alongside the boards, badged Arrive.
💡 Each source shows a status dot in the top right corner of the app, so a connection that has quietly lapsed is visible rather than silent. If searches start returning noticeably fewer loads than usual, check here first — board authorizations do expire, and the symptom is simply less freight, not an error.
⚠️ The sources do not all publish the same detail. Broker contact sometimes loads only when you open a load’s details, and freight notes are published by some boards and not others — which is why the Freight Filters heading tells you how many of your results carry any (Section 3).
6
Invite Your Team

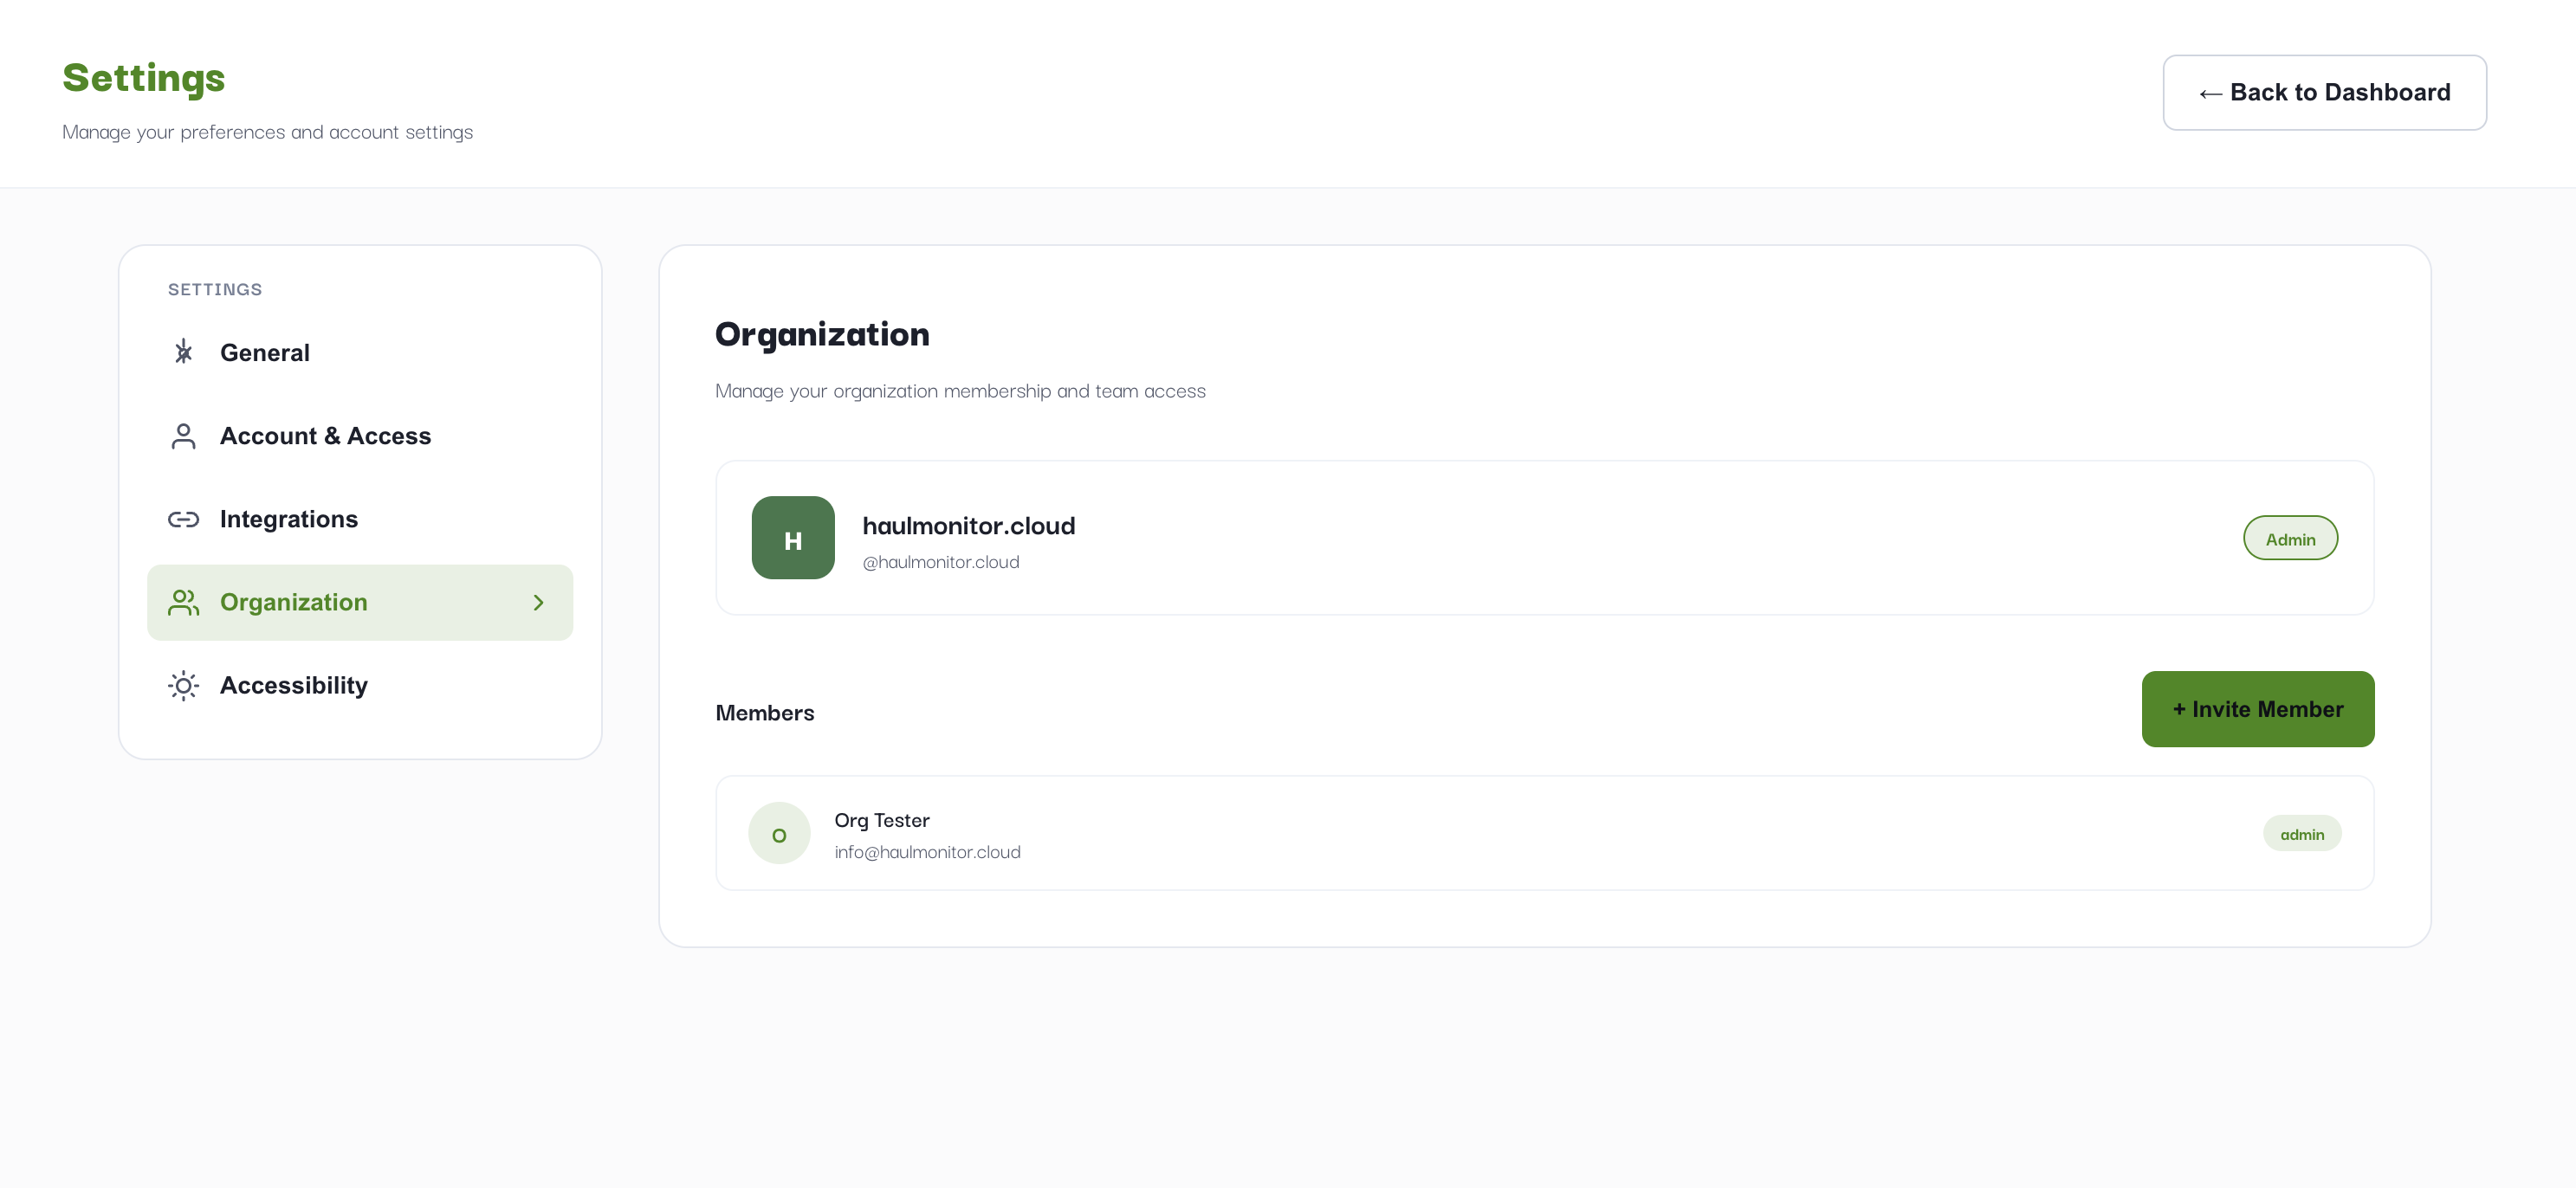
To add colleagues, go to Settings and select Organization. You'll see your organization name, your email domain, and the current member list. Click + Invite Member to send an invitation. Each invited user will receive an email with a link to create their account and will be joined to your organization automatically.

Settings — Organization panel showing org name, members list, and Invite Member button
⚠️ Invited colleagues should use the link in their invitation email to register — not the standard Create Account flow. The invite link ties their account to your organization.
Setting Up Your Fleet

Your fleet profile is the foundation of Haul Monitor. It stores your equipment details, home base location, and the rate structure used to calculate net revenue on every backhaul opportunity. Complete your fleet profile before creating any requests.

1
Navigate to Fleet Setup

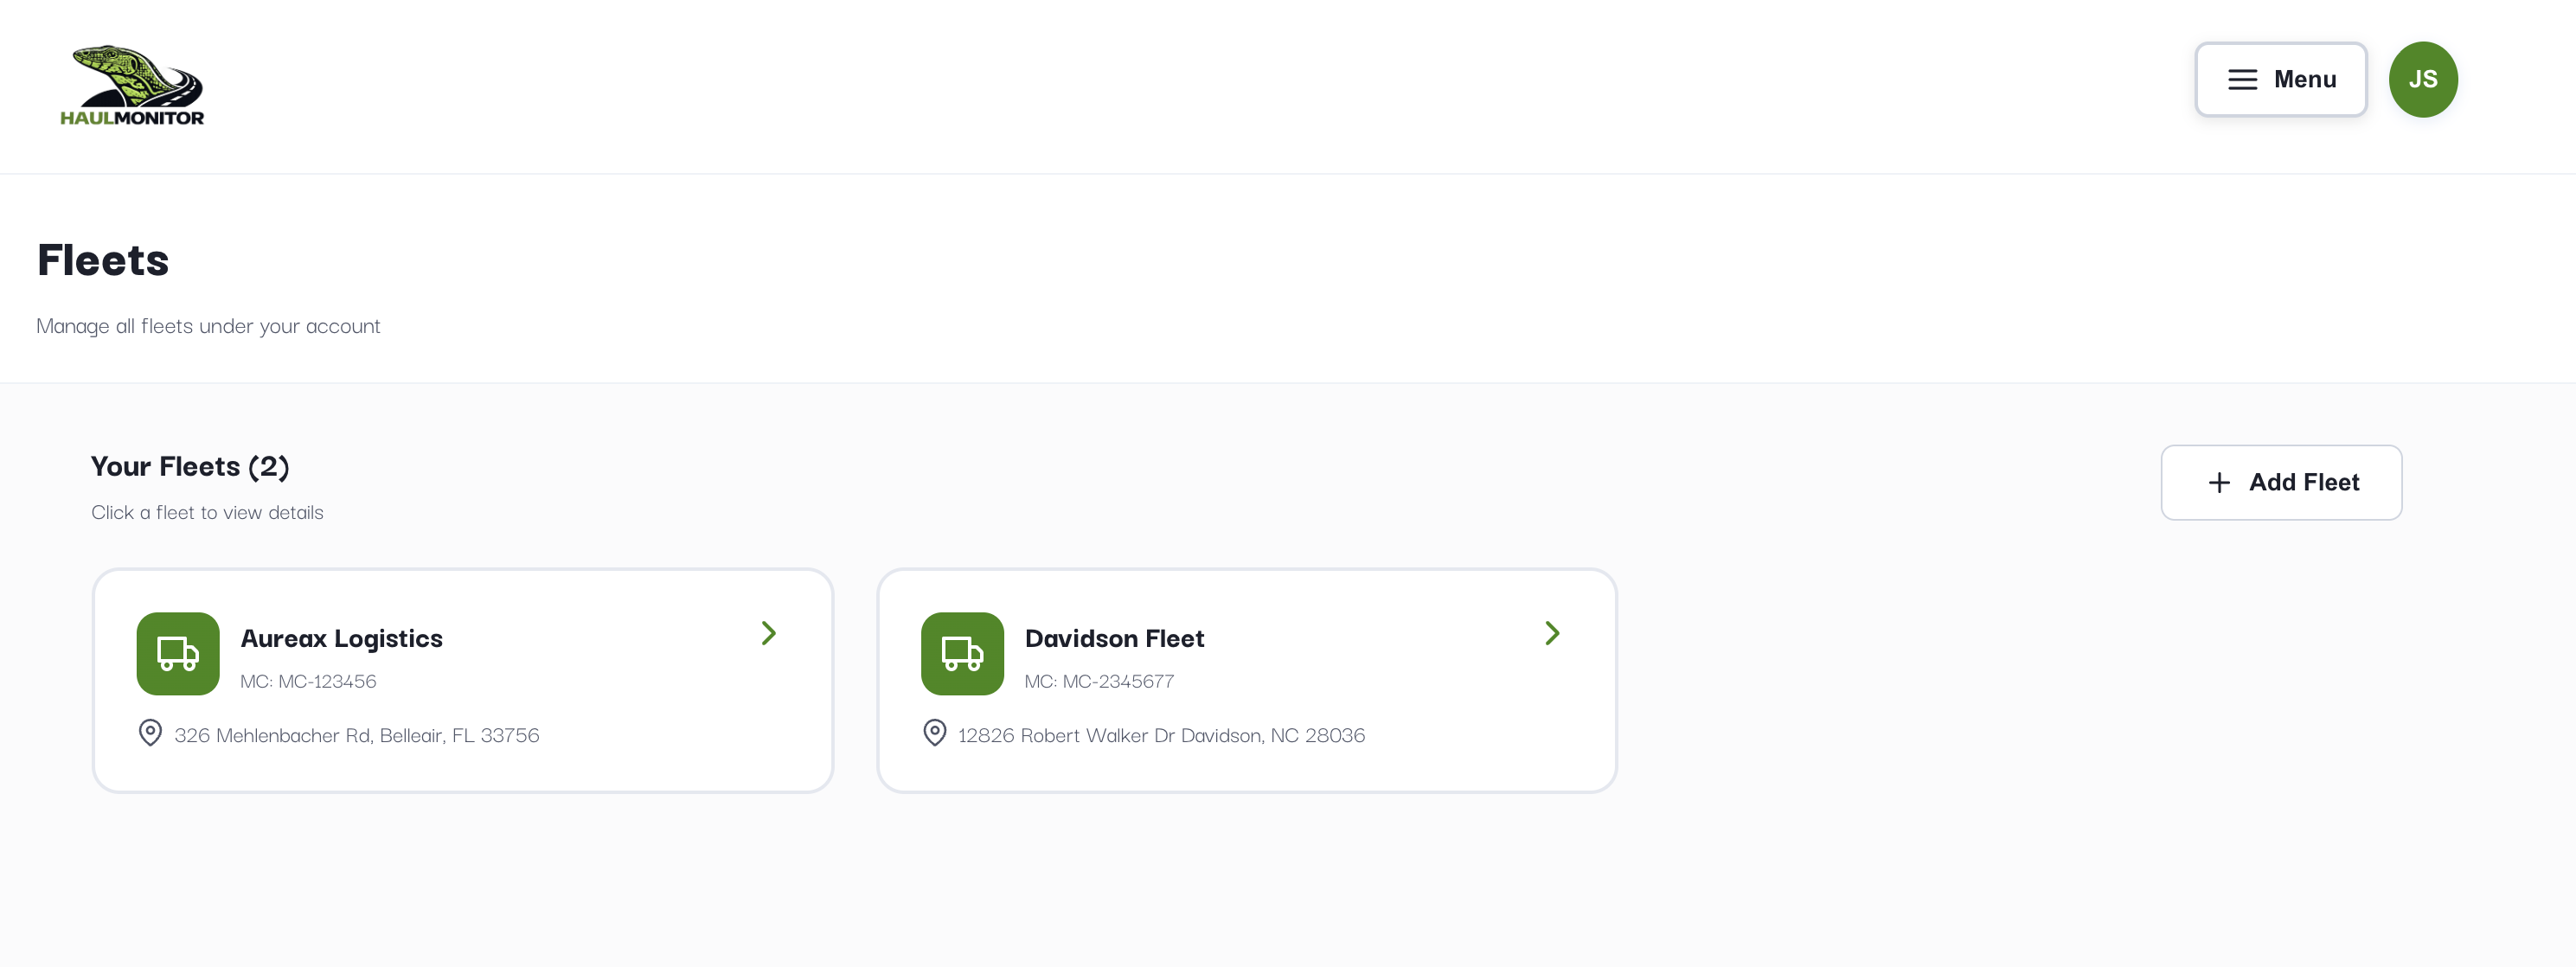
From the navigation menu select Fleets. On the Fleets page, click New Fleet to open the setup form.

Fleets page showing existing fleets and Add Fleet button
2
Enter Fleet Information

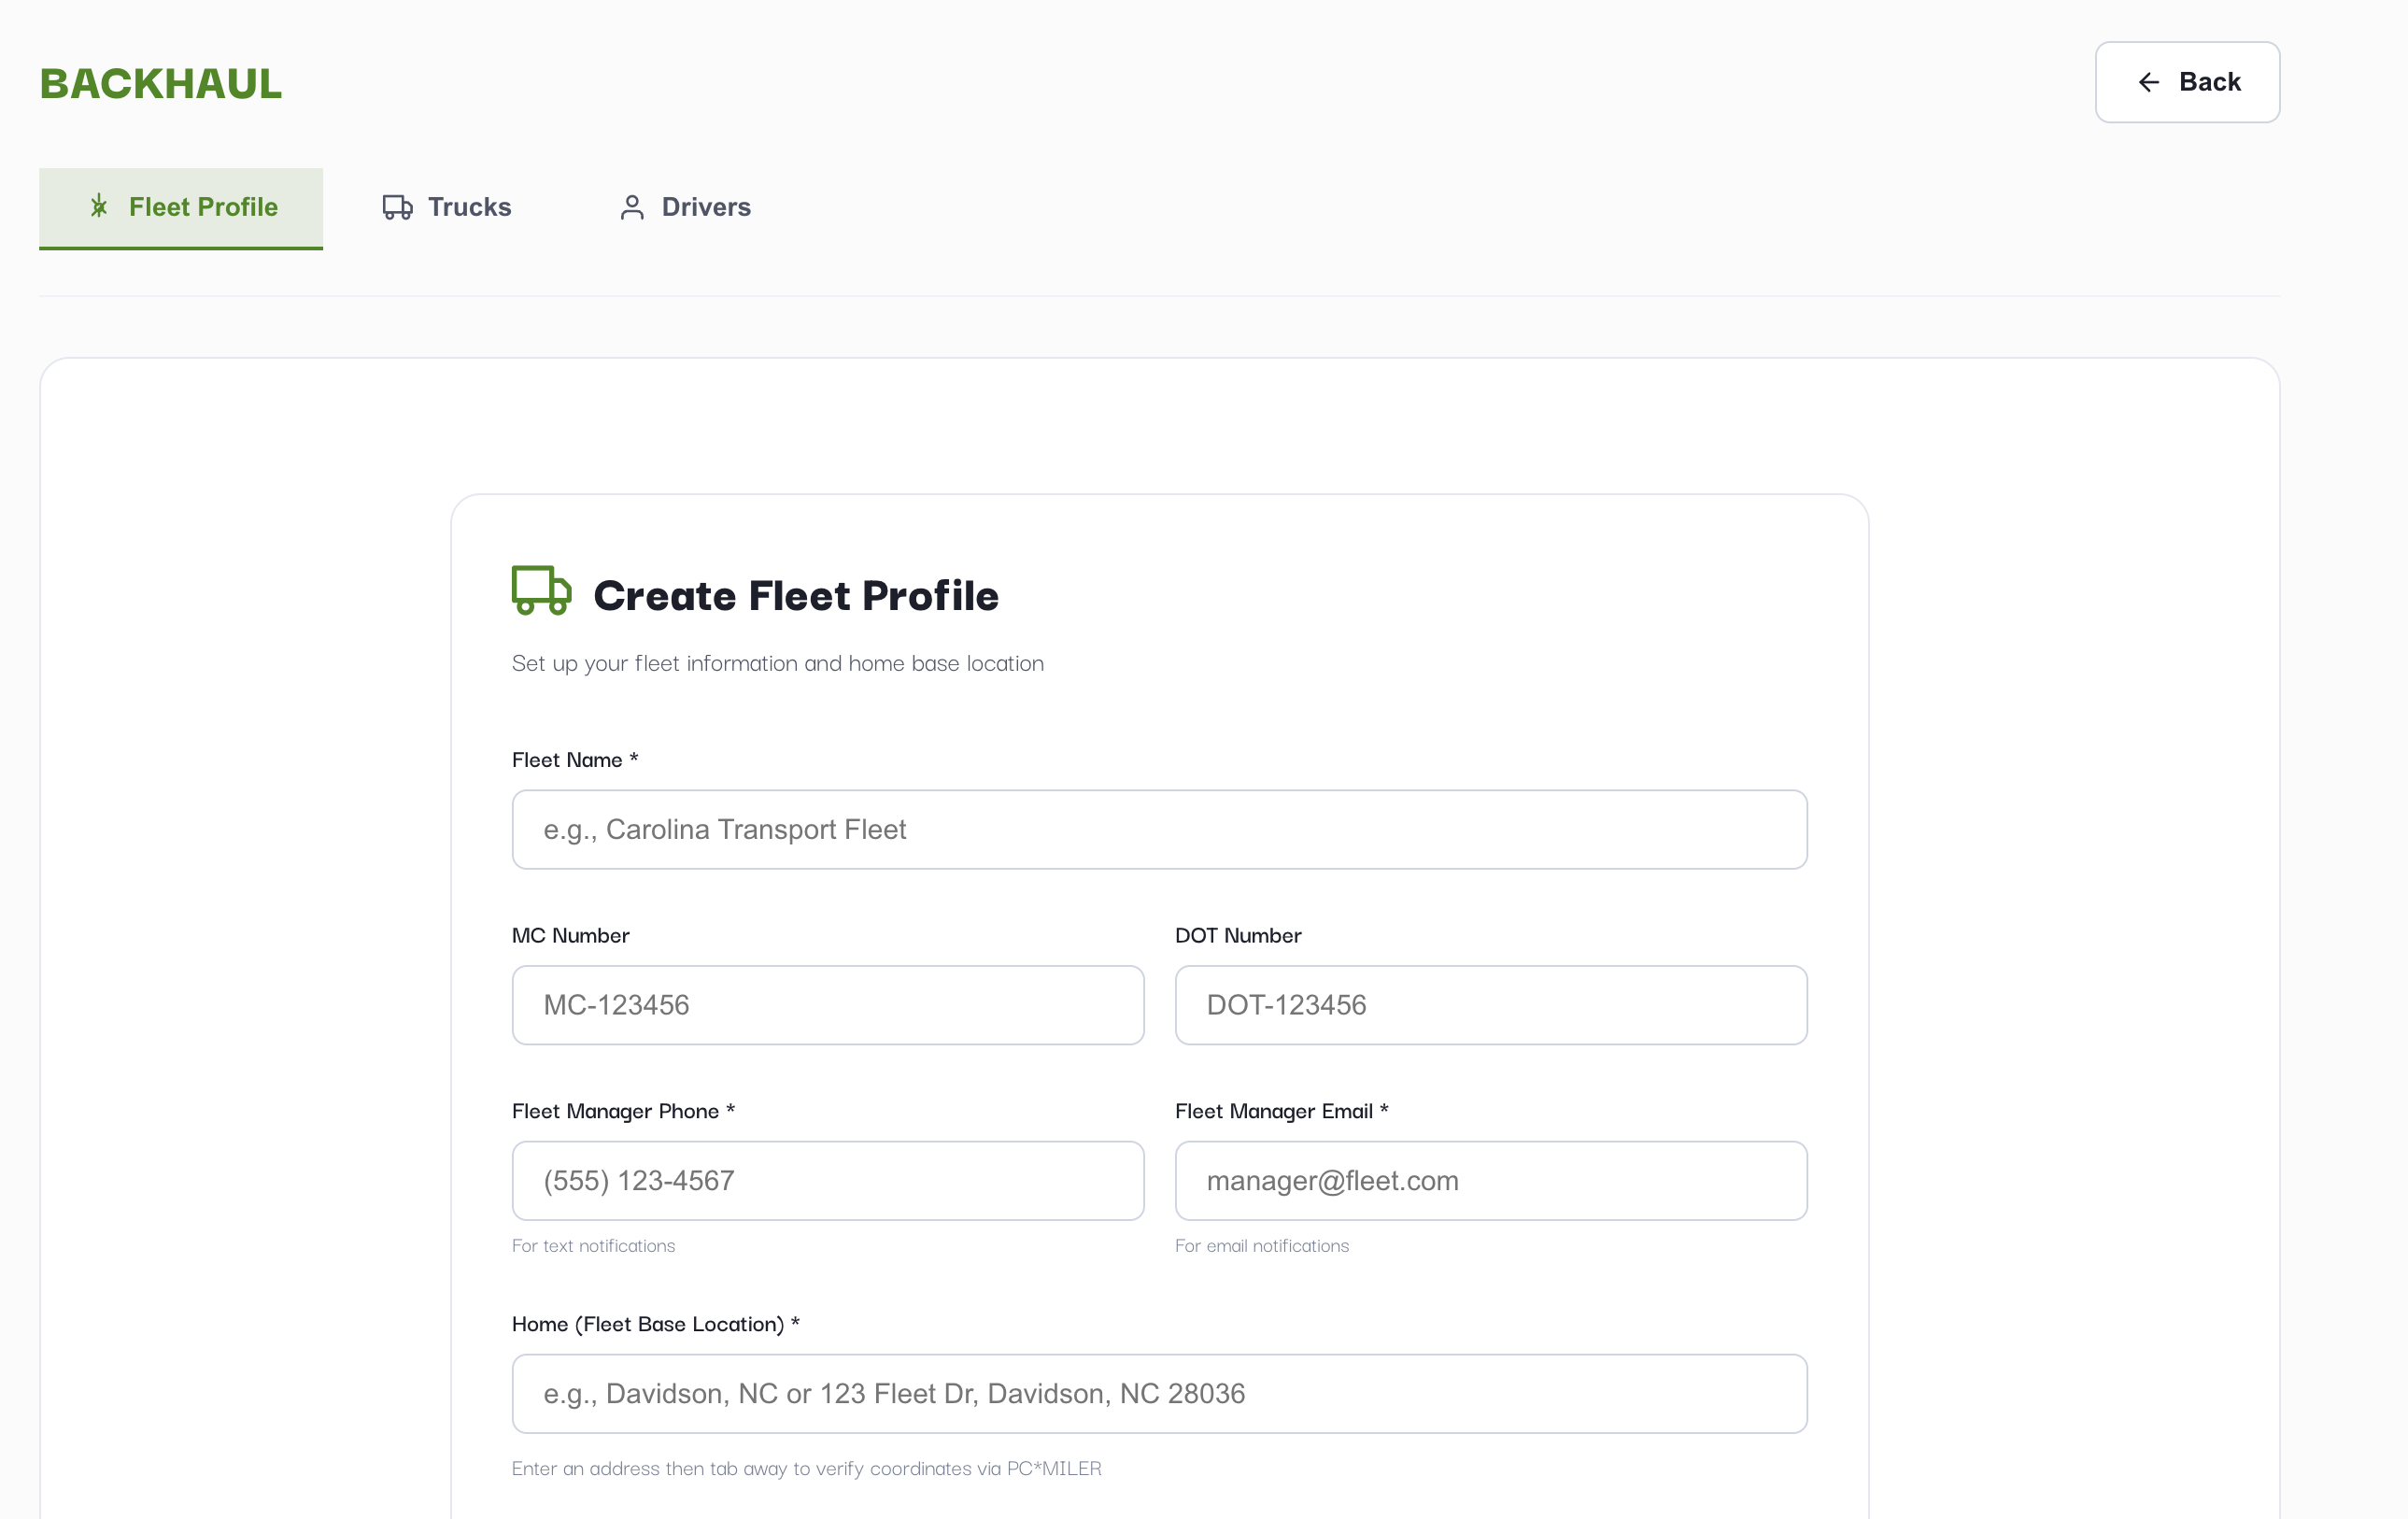
Fill in the fleet's name and the contact who should hear about opportunities. Fields marked * are required.

Fleet Name *
Your company or fleet name (e.g., Carolina Transport Fleet)
Phone *
Used only for SMS load alerts you opt into per request — message and data rates may apply, and replying STOP cancels them
Email *
Used for email notifications about this fleet
💡 These belong to the fleet, not to whoever is signed in — so a dispatcher can set a fleet up and the person who actually needs the alert still receives it.
New Fleet profile form showing Fleet Name, Phone, Email, Home Address, Equipment Type, Operation Type and the rate configuration fields
3
Choose the Fleet’s Equipment Type

Pick the one equipment type this fleet runs. There are five choices, and they are deliberately broad — each one stands for a whole family of trailers rather than a single spec.

Dry Van
Standard enclosed van freight
Flatbed
The open-deck family — flatbed, step deck, lowboy, removable gooseneck, double drop, Conestoga and curtain side
Reefer
Temperature-controlled. Reefers also see dry van freight, because a reefer can haul dry
Tanker
Liquid and bulk tank freight
Power Only
Tractor supplied, trailer provided by the shipper or broker

The rule is widen here, narrow later. Your fleet setting decides how much freight the search is allowed to see, so it is intentionally generous: a Flatbed fleet is shown step deck and lowboy work as well as plain flatbed, because those are loads it can genuinely take. You then narrow to exactly what you want on the results page, where you can see what is actually on offer that day.

💡 If you previously ran Step Deck or Hotshot, your fleet now shows Flatbed. Nothing has been taken away — you will see everything you saw before, plus the rest of the open-deck board. Use the Equipment Filters on the results page to narrow back down.
4
Set Your Home Base Location

Enter your fleet's home base address — this is where your trucks return to after deliveries. Haul Monitor uses this to calculate out-of-route miles for each backhaul opportunity.

Home Address *
City and state or full street address (e.g., Davidson, NC or 123 Fleet Dr, Davidson, NC 28036)
💡 After entering the address, click the Verify button. Haul Monitor confirms the location via PC*MILER and shows a ✓ Verified badge with the exact coordinates.
5
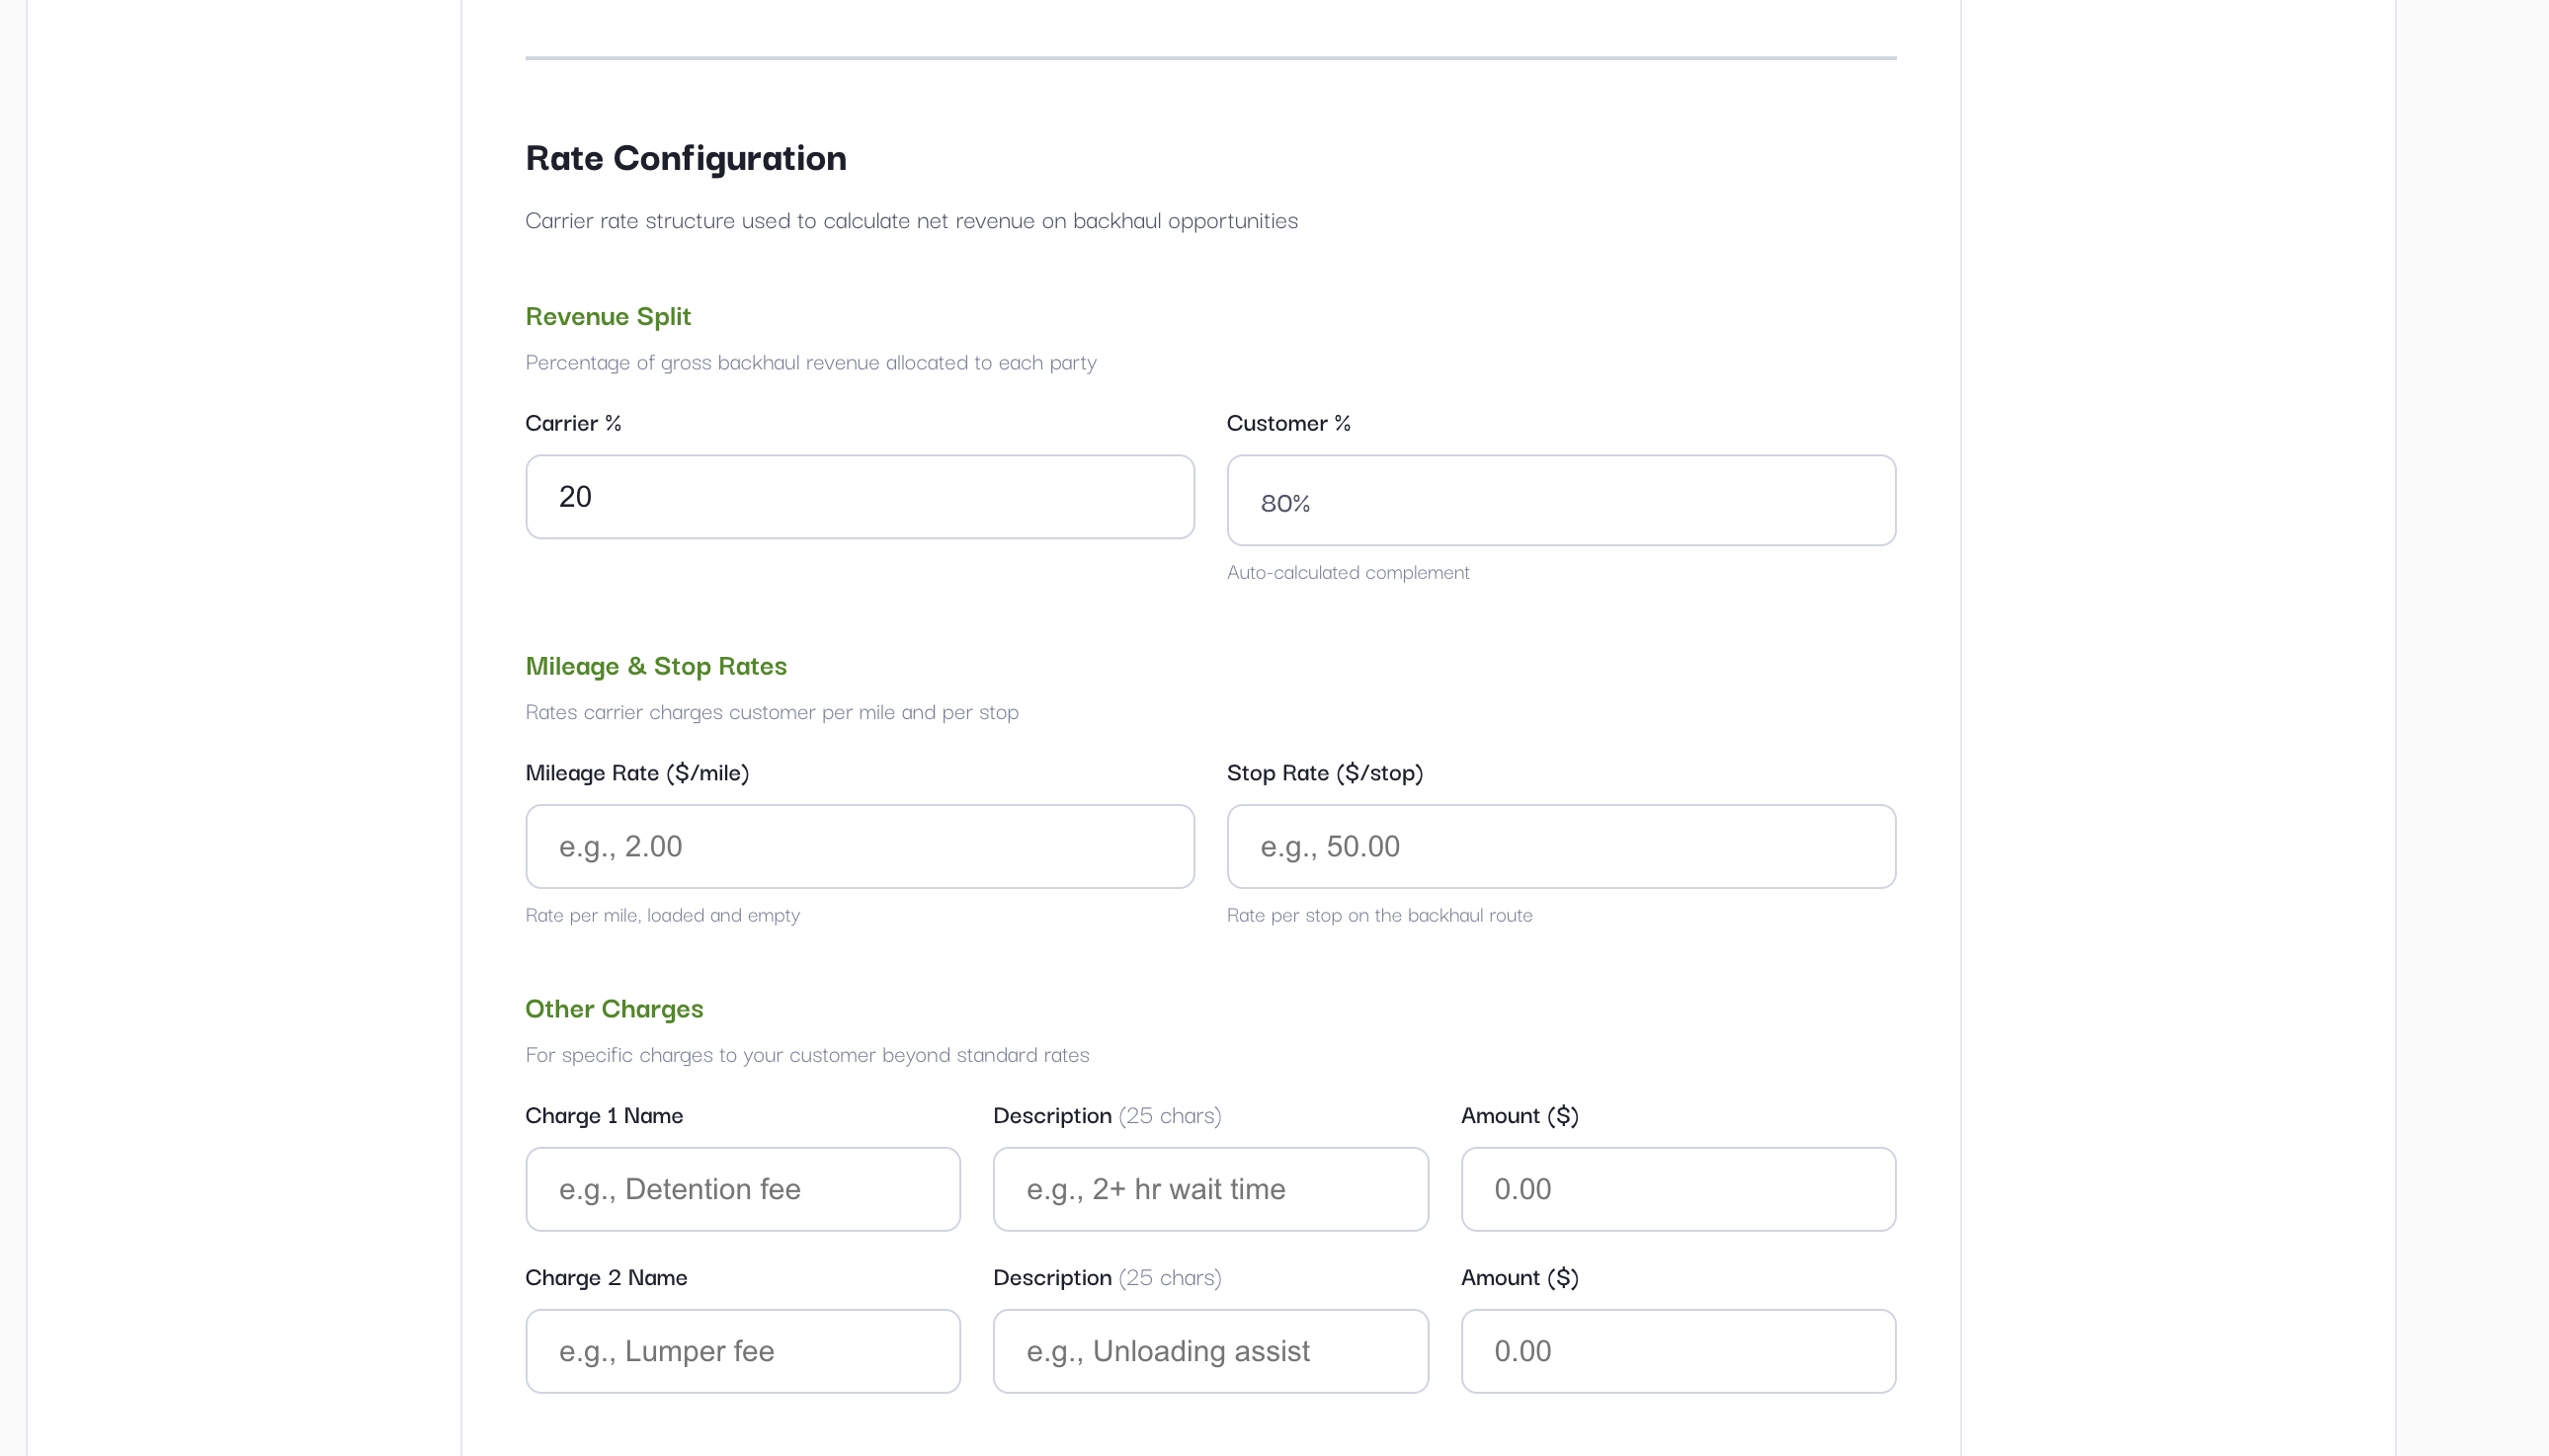
Configure Rate Structure

The Rate Configuration section drives all financial calculations in your backhaul and estimate reports. Scroll down past the fleet information to find it.

Operation Type
Choose Dedicated carrier or Private fleet. This is the first thing to set here, because it changes the wording of every figure that follows — a dedicated carrier is shown revenue earned, a private fleet is shown cost recovered.
💡 Dedicated carrier vs. private fleet. Dedicated carriers enter values based on their billing rates and contract to the customer. Private fleets evaluate backhauls against their own cost to run the truck — enter your expense in each category, set the carrier split to 100%, and base fuel on the PADD of purchase plus your fleet's MPG. Each field notes the private-fleet meaning inline.
Revenue Split
How gross load revenue is divided between your fleet (carrier) and the shipper (customer).
Carrier Revenue Split
Percentage of load revenue paid to your fleet. The Customer % is auto-calculated as the complement (e.g., Carrier 20% → Customer 80%).
Mileage & Stop Rates
Rates charged for out-of-route miles and extra stops created by taking the backhaul.
Mileage Rate ($/mile)
Your cost per out-of-route mile, loaded and empty (e.g., 2.00)
Stop Rate ($/stop)
Cost per additional stop on the backhaul route (e.g., 50.00)
Other Charges Optional
Up to two additional per-load charges (e.g., detention fees, lumper fees).
Charge Name
Short label shown on reports (e.g., Detention fee)
Description
Brief explanation, max 25 characters (e.g., 2+ hr wait time)
Amount ($)
Fixed cost applied per load
Rate Configuration showing Revenue Split, Mileage & Stop Rates, and Other Charges
Fuel Surcharge (FSC)
Haul Monitor calculates FSC automatically using live DOE diesel prices, or you can enter a rate manually.
Fuel Peg ($/gal)
Your baseline fuel cost per gallon already included in your mileage rate (e.g., 1.200)
Fuel Economy (MPG)
Average fuel economy of your fleet — typically 6–8 mpg (default: 6.0)
DOE PADD Region
Select your region for live DOE diesel price feeds. The current price auto-fills from EIA.gov.
DOE PADD Rate ($/gal)
Current diesel price. Auto-populated when a DOE PADD Region is selected, or enter manually.
💡 FSC per mile = (DOE PADD Rate − PEG) ÷ MPG. For example: ($3.736 − $1.200) ÷ 6.0 = $0.423/mile.
6
Share the Fleet With Colleagues Optional

At the bottom of the form, Shared with (view only) lets you add org members by name or email. They can see the fleet and choose it on their own requests, but cannot edit it — useful when one person maintains the rate configuration and others run searches against it.

7
Save the Fleet Profile

Click Save Profile at the bottom of the form. You can edit your fleet profile at any time — changes take effect on the next request run.

💡 Need a similar fleet? Click Duplicate Fleet (next to Delete Fleet) to copy the entire profile — rates, fuel settings, equipment, and charges — as "Copy of <name>". Just rename it and adjust what differs; trucks and drivers are not copied.
Creating a Backhaul Request

A Backhaul Request tells Haul Monitor where your truck currently is (the empty location) and when the equipment needs to be back home. The system searches the load boards and brokers you've connected (see Section 4), scores every opportunity by out-of-route efficiency and net revenue, and presents the best matches in a ranked list with a route map.

1
Open the Request Form

From the navigation menu select Search and click New.

2
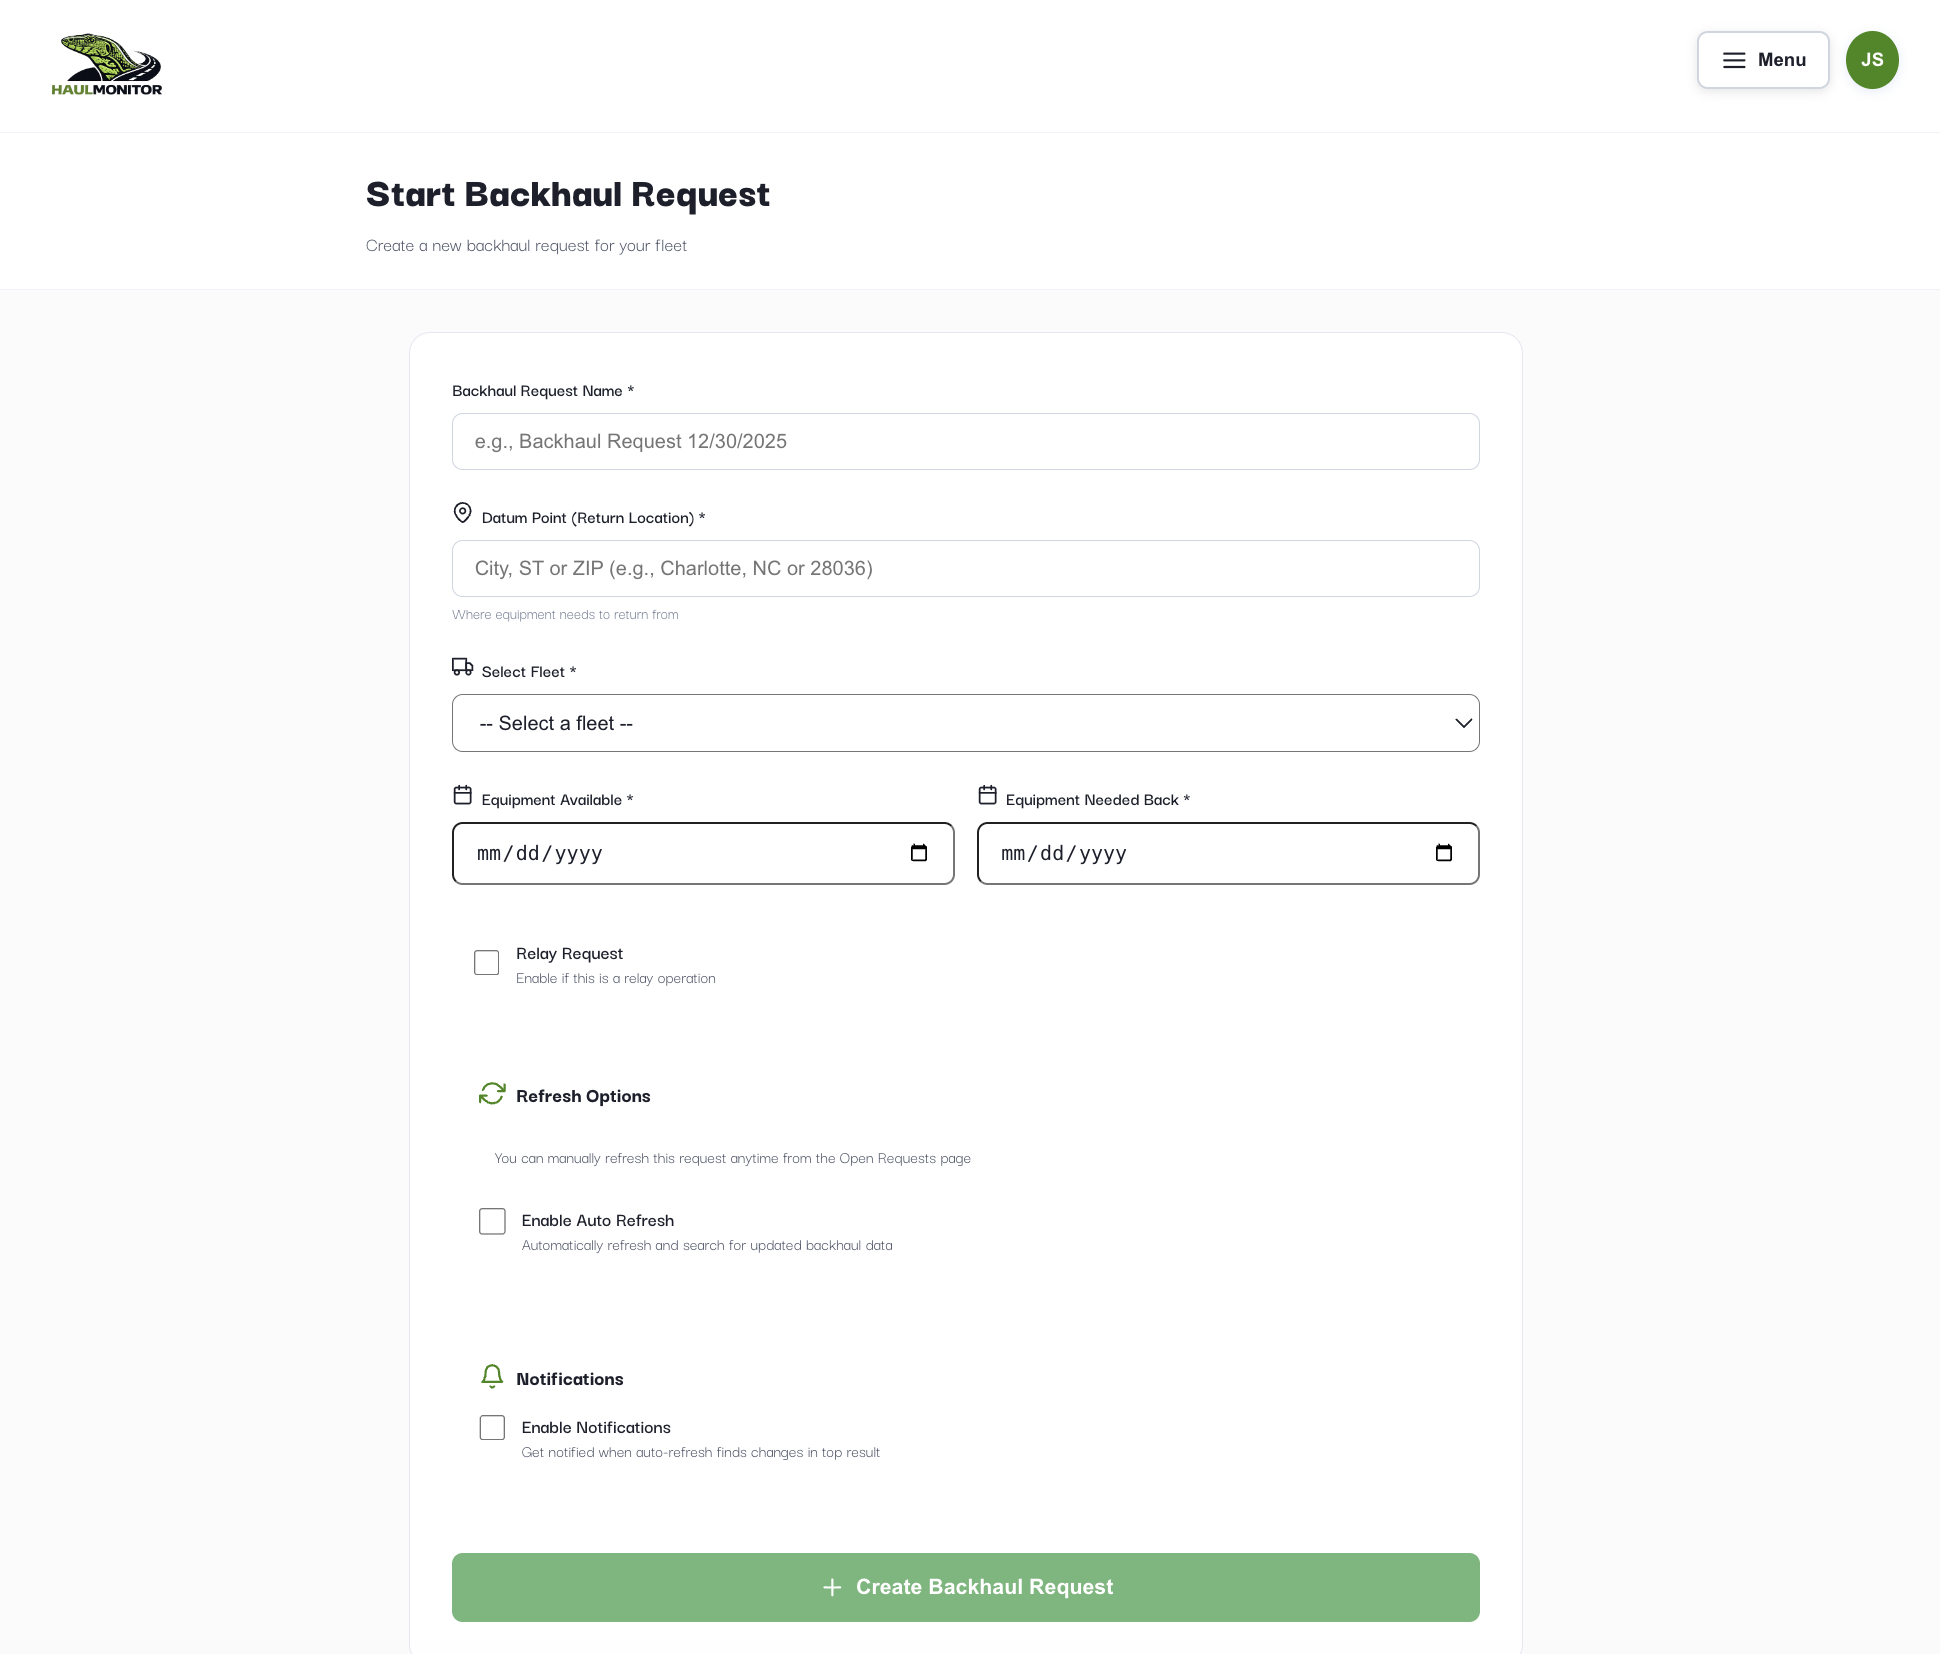
Fill in the Request Details
Request Name *
A descriptive name for this request (e.g., Backhaul Request 12/30/2025)
Empty City, ST *
Where your truck currently is or will be at the start of its return home. Enter city/state or ZIP (e.g., Charlotte, NC or 28036).
Fleet *
Choose which fleet this request is for. The fleet's home base and rate config are used for all calculations.
Begin Pickup Window
The earliest date the truck is available to pick up a backhaul load
End Pickup Window
The last day of the pickup window. Once this date is fully in the past the request is marked Inactive and can't be run — edit the dates forward to re-enable it instantly (no credits are spent on inactive requests).
Driver Needed Home By
Optional. The date the driver must be back home — shown on search results and each load's details for dispatcher visibility. It does not affect which loads are matched.
3
Set Options — Relay, Auto-Refresh, Notifications
Relay mode Optional
Toggle Relay mode — load dropped prior to delivery if the load will be handled by a relay driver rather than your outbound truck running the full route home. Mileage is calculated as the relay driver's complete loop.
Modes Optional
Select transport modes (Truck Load, LTL, Intermodal, etc.) to limit this search to those modes. Modes live on the request only — they describe this trip, not the fleet — so picking none means the search is not restricted by mode at all.
Auto-refresh results Optional
Toggle Auto-refresh results and Haul Monitor will automatically re-run the search on a schedule so your results stay current without manual intervention. Choose from 30 min to 24 hr intervals. An auto-refresh only spends a credit when it finds a material change (a new best load, or a meaningful shift in the top result) — refreshes that turn up nothing new are free. Running a search manually resets the countdown to a full interval.
Notify me when top loads change Optional
Toggle Notify me when top loads change to get alerted by email, text, or both when auto-refresh detects a change in the top result. Sent to the phone and email on your fleet profile.
Backhaul request form showing all fields including Driver Needed Home By, with Relay mode, Modes, Auto-refresh results, and Notify me toggles, and Save Request button
4
Submit the Request

Click Save Request. Haul Monitor geocodes the empty location, builds the route corridor from your location to fleet home, and scores all matching loads. This typically takes 5–15 seconds.

5
Review Results

Your request appears in Search. Click a request to open the full results view, and Run Search to execute the search.
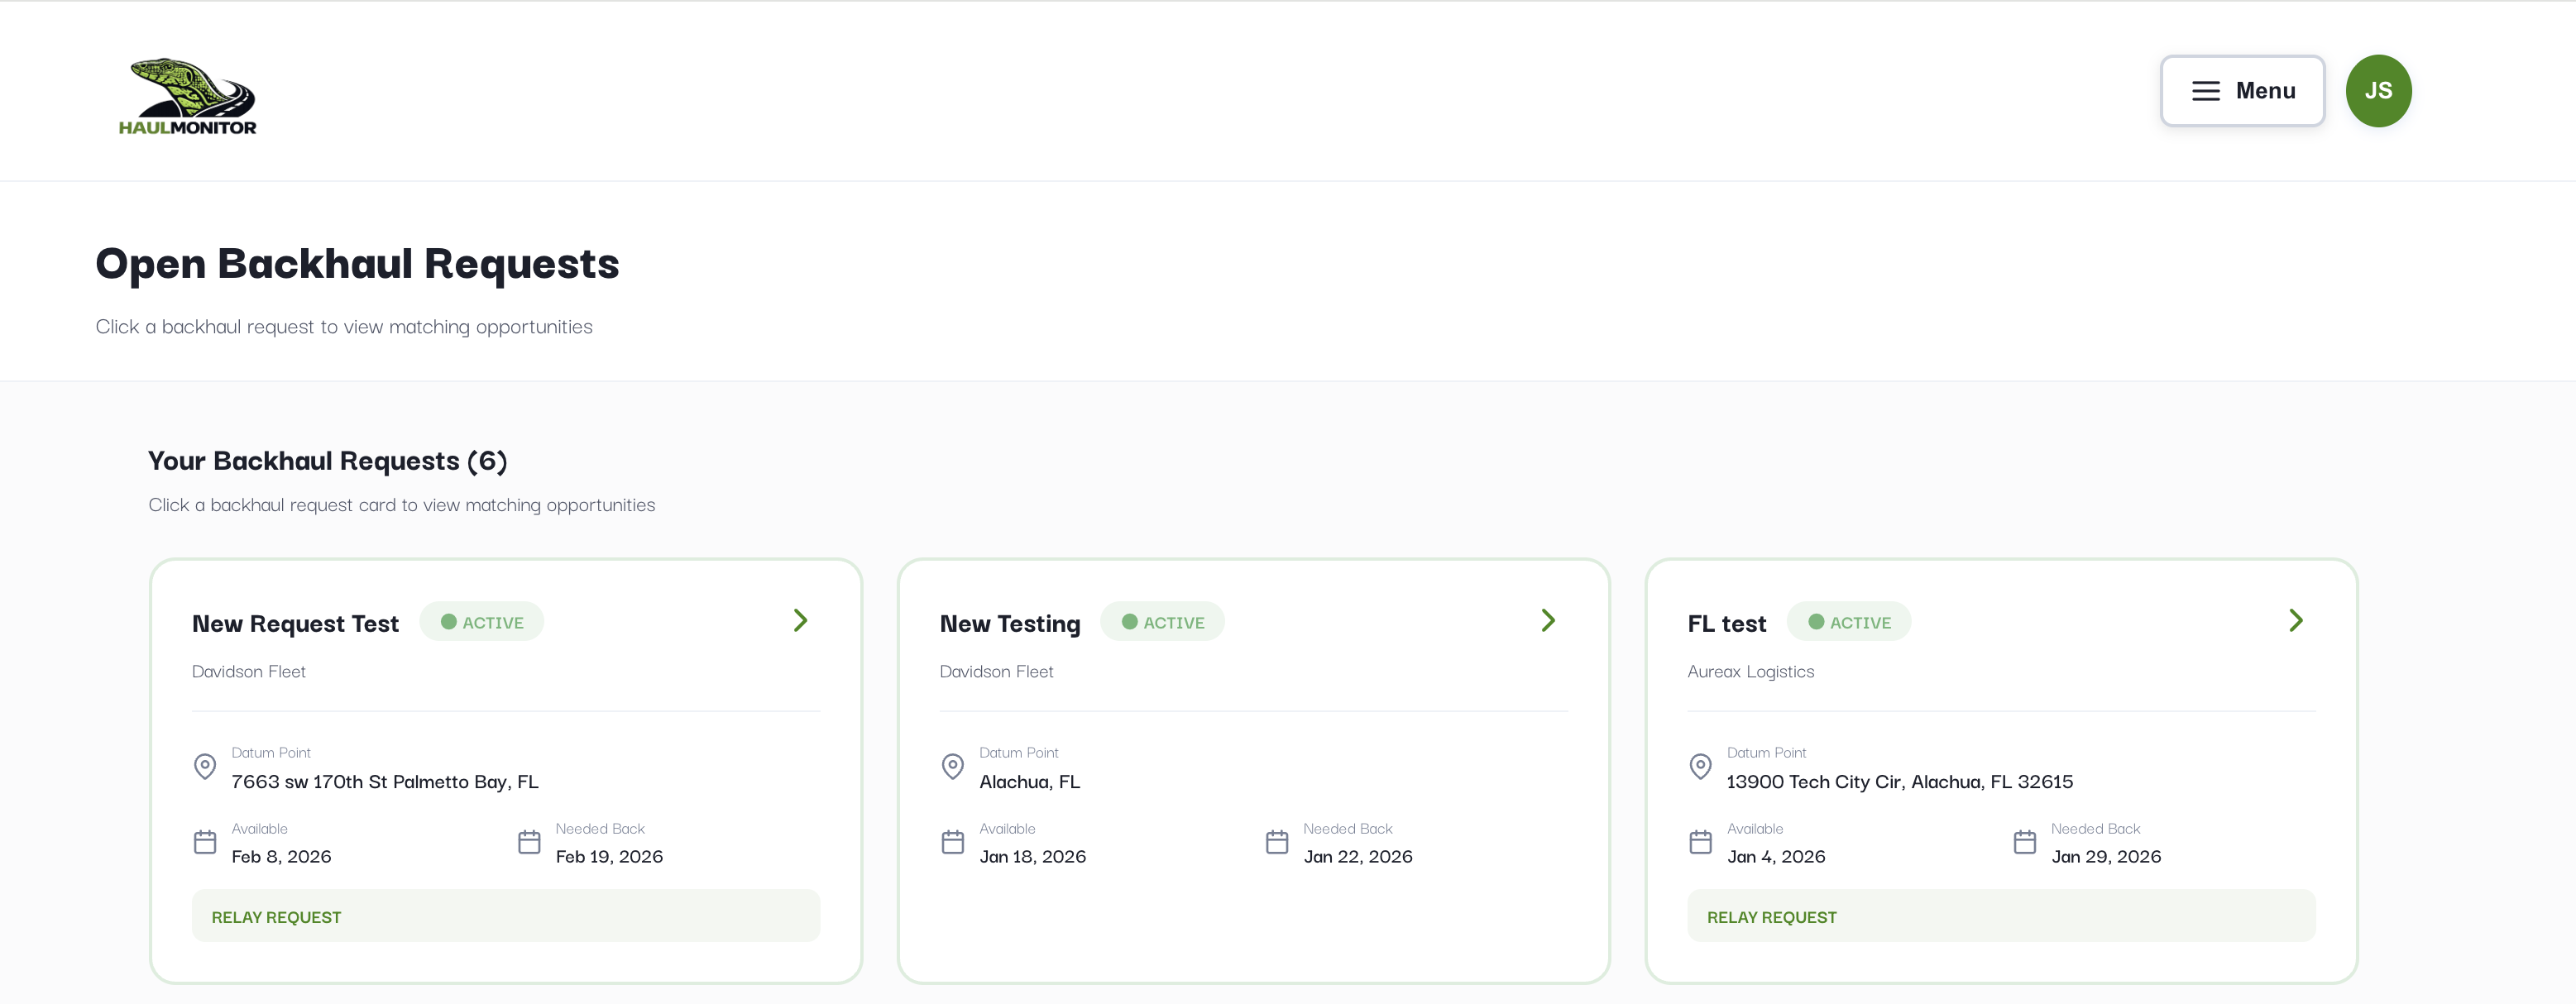
Open Backhaul Requests page showing active request cards

The Route Map shows the top 10 opportunities plotted along your corridor home. The red A marker is your empty location; the green B is fleet home. Numbered circles show pickup locations, and those numbers match the ranked cards below — including after you use the filters, since the map redraws to show only what you have narrowed to.
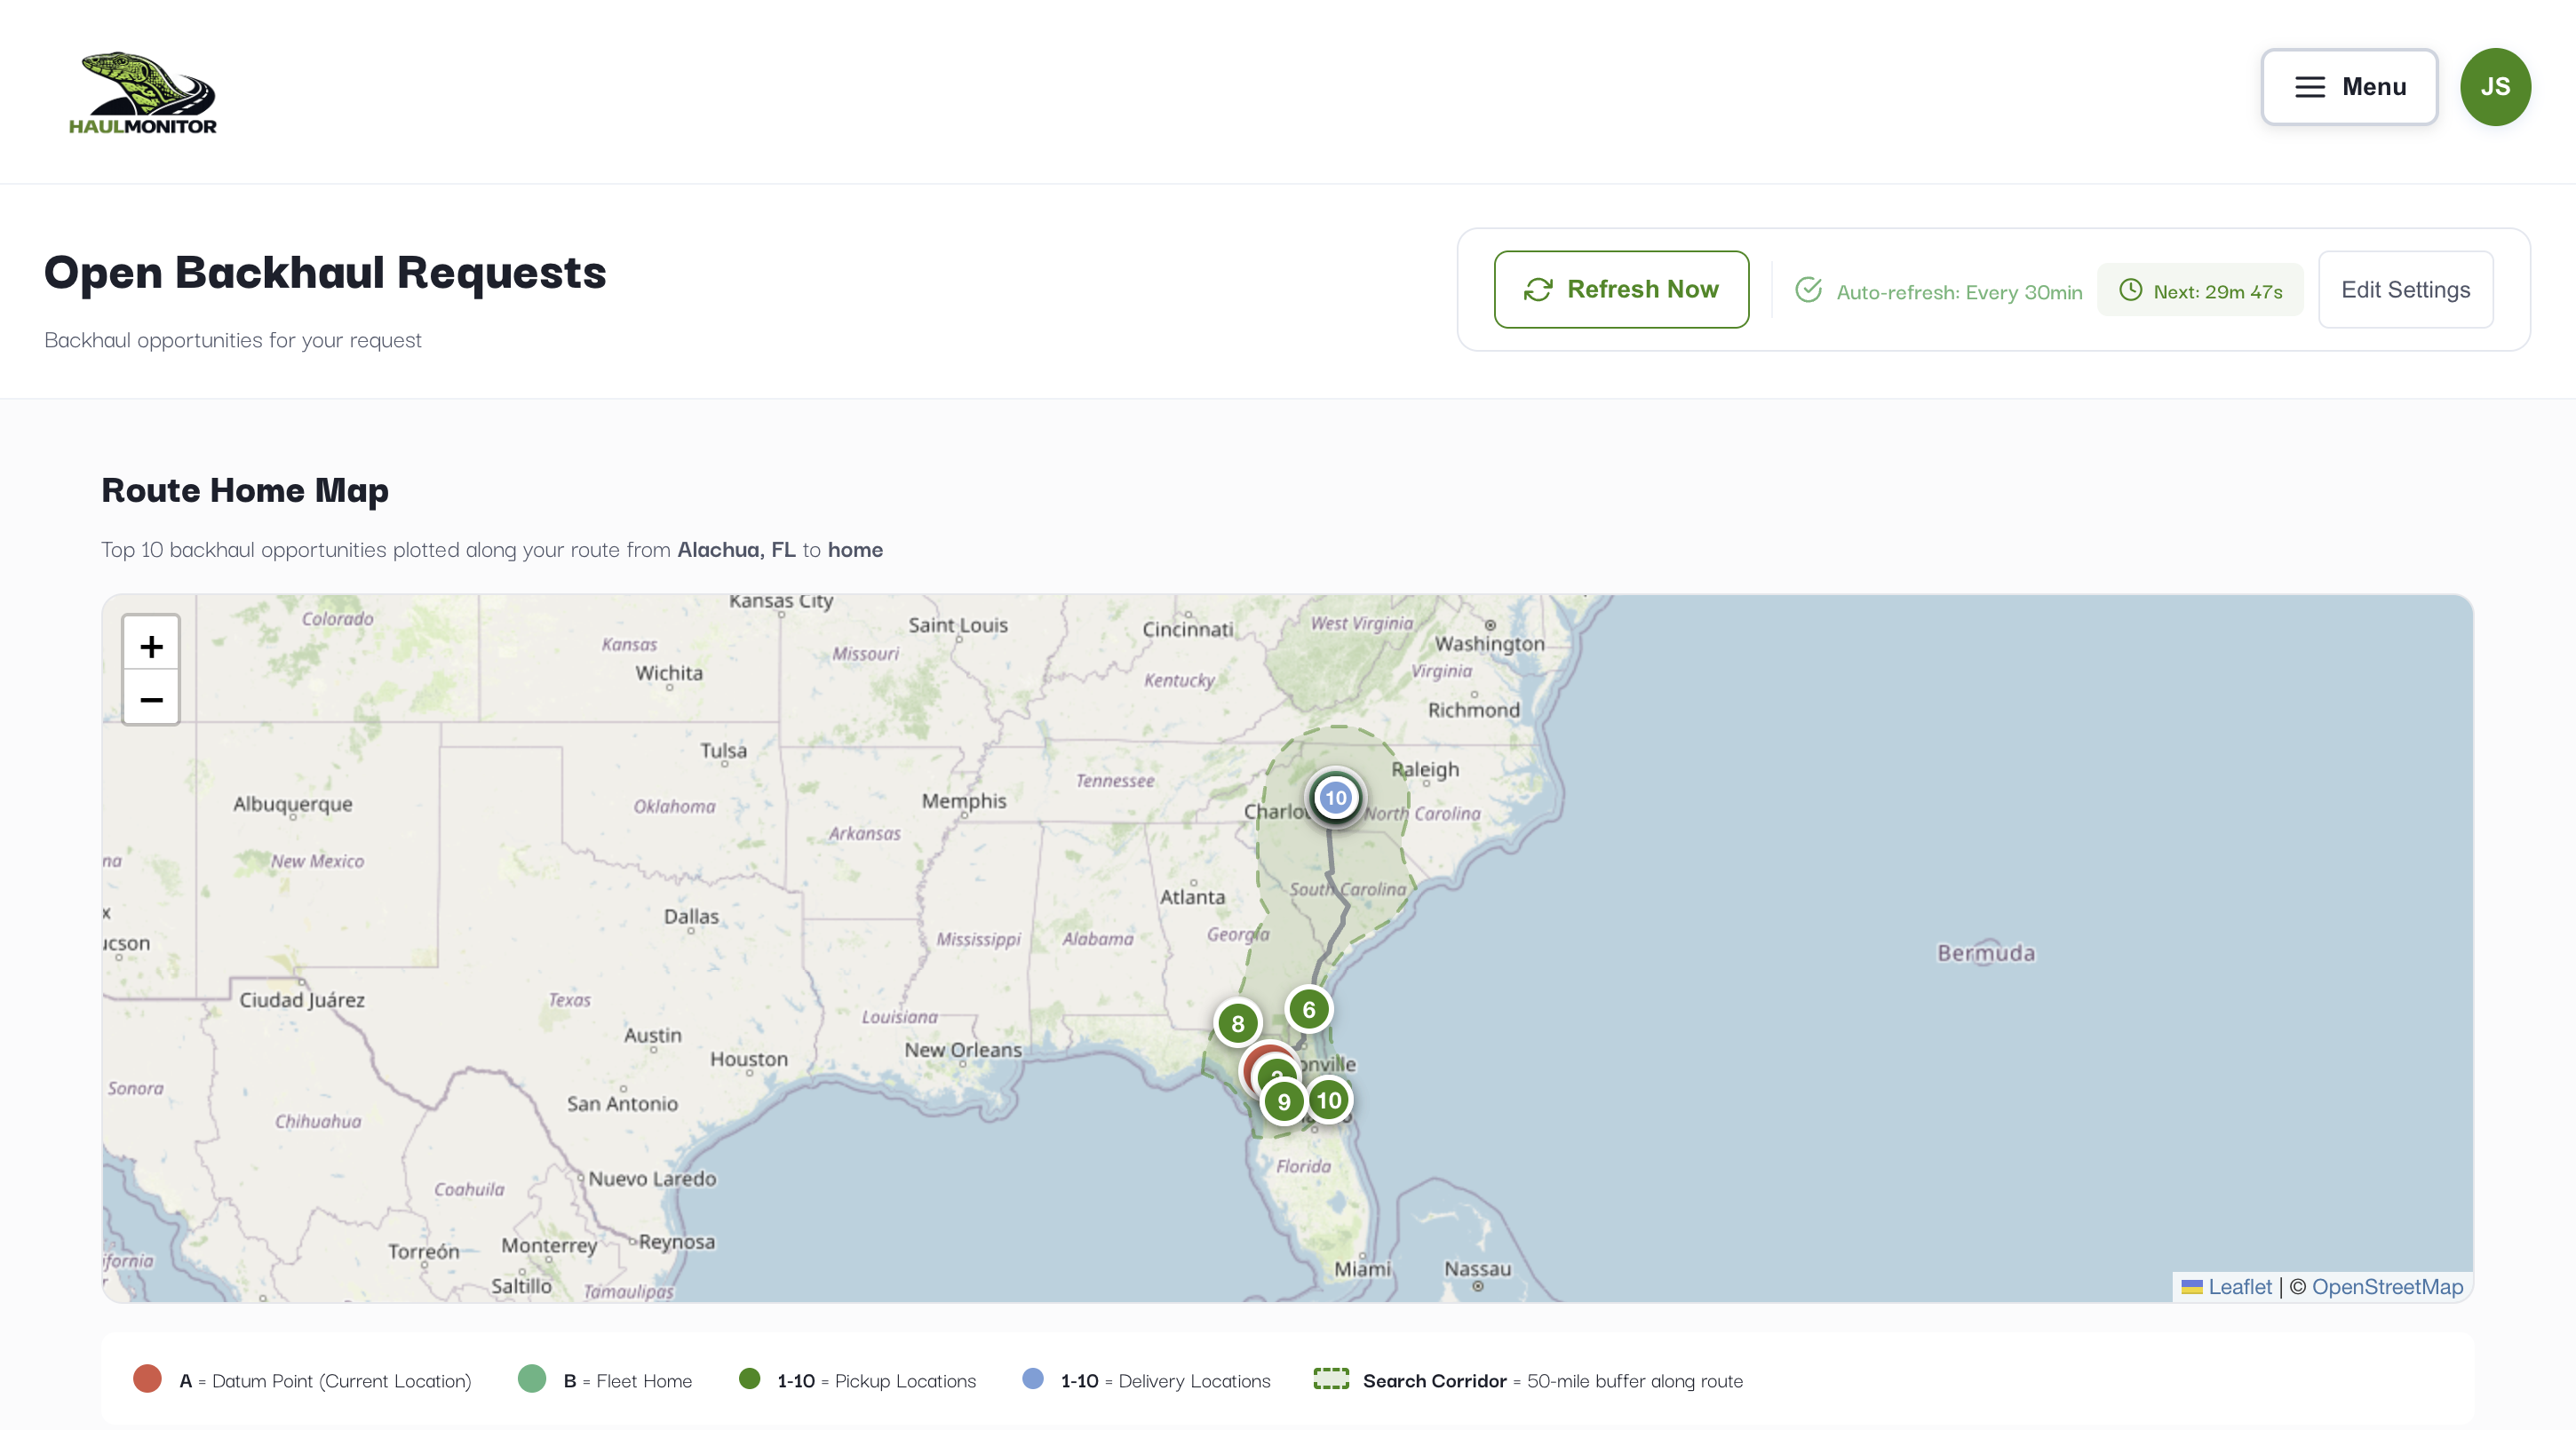
Route Home Map with the corridor and numbered markers, and beneath it the Equipment Filters (Flatbed selected, Step Deck, Lowboy, Conestoga) and Freight Filters rows, with the coverage line and a Showing 103 of 119 loads count

Below the map, opportunities are ranked by Customer Net Credit (highest first) with a full financial breakdown per load.
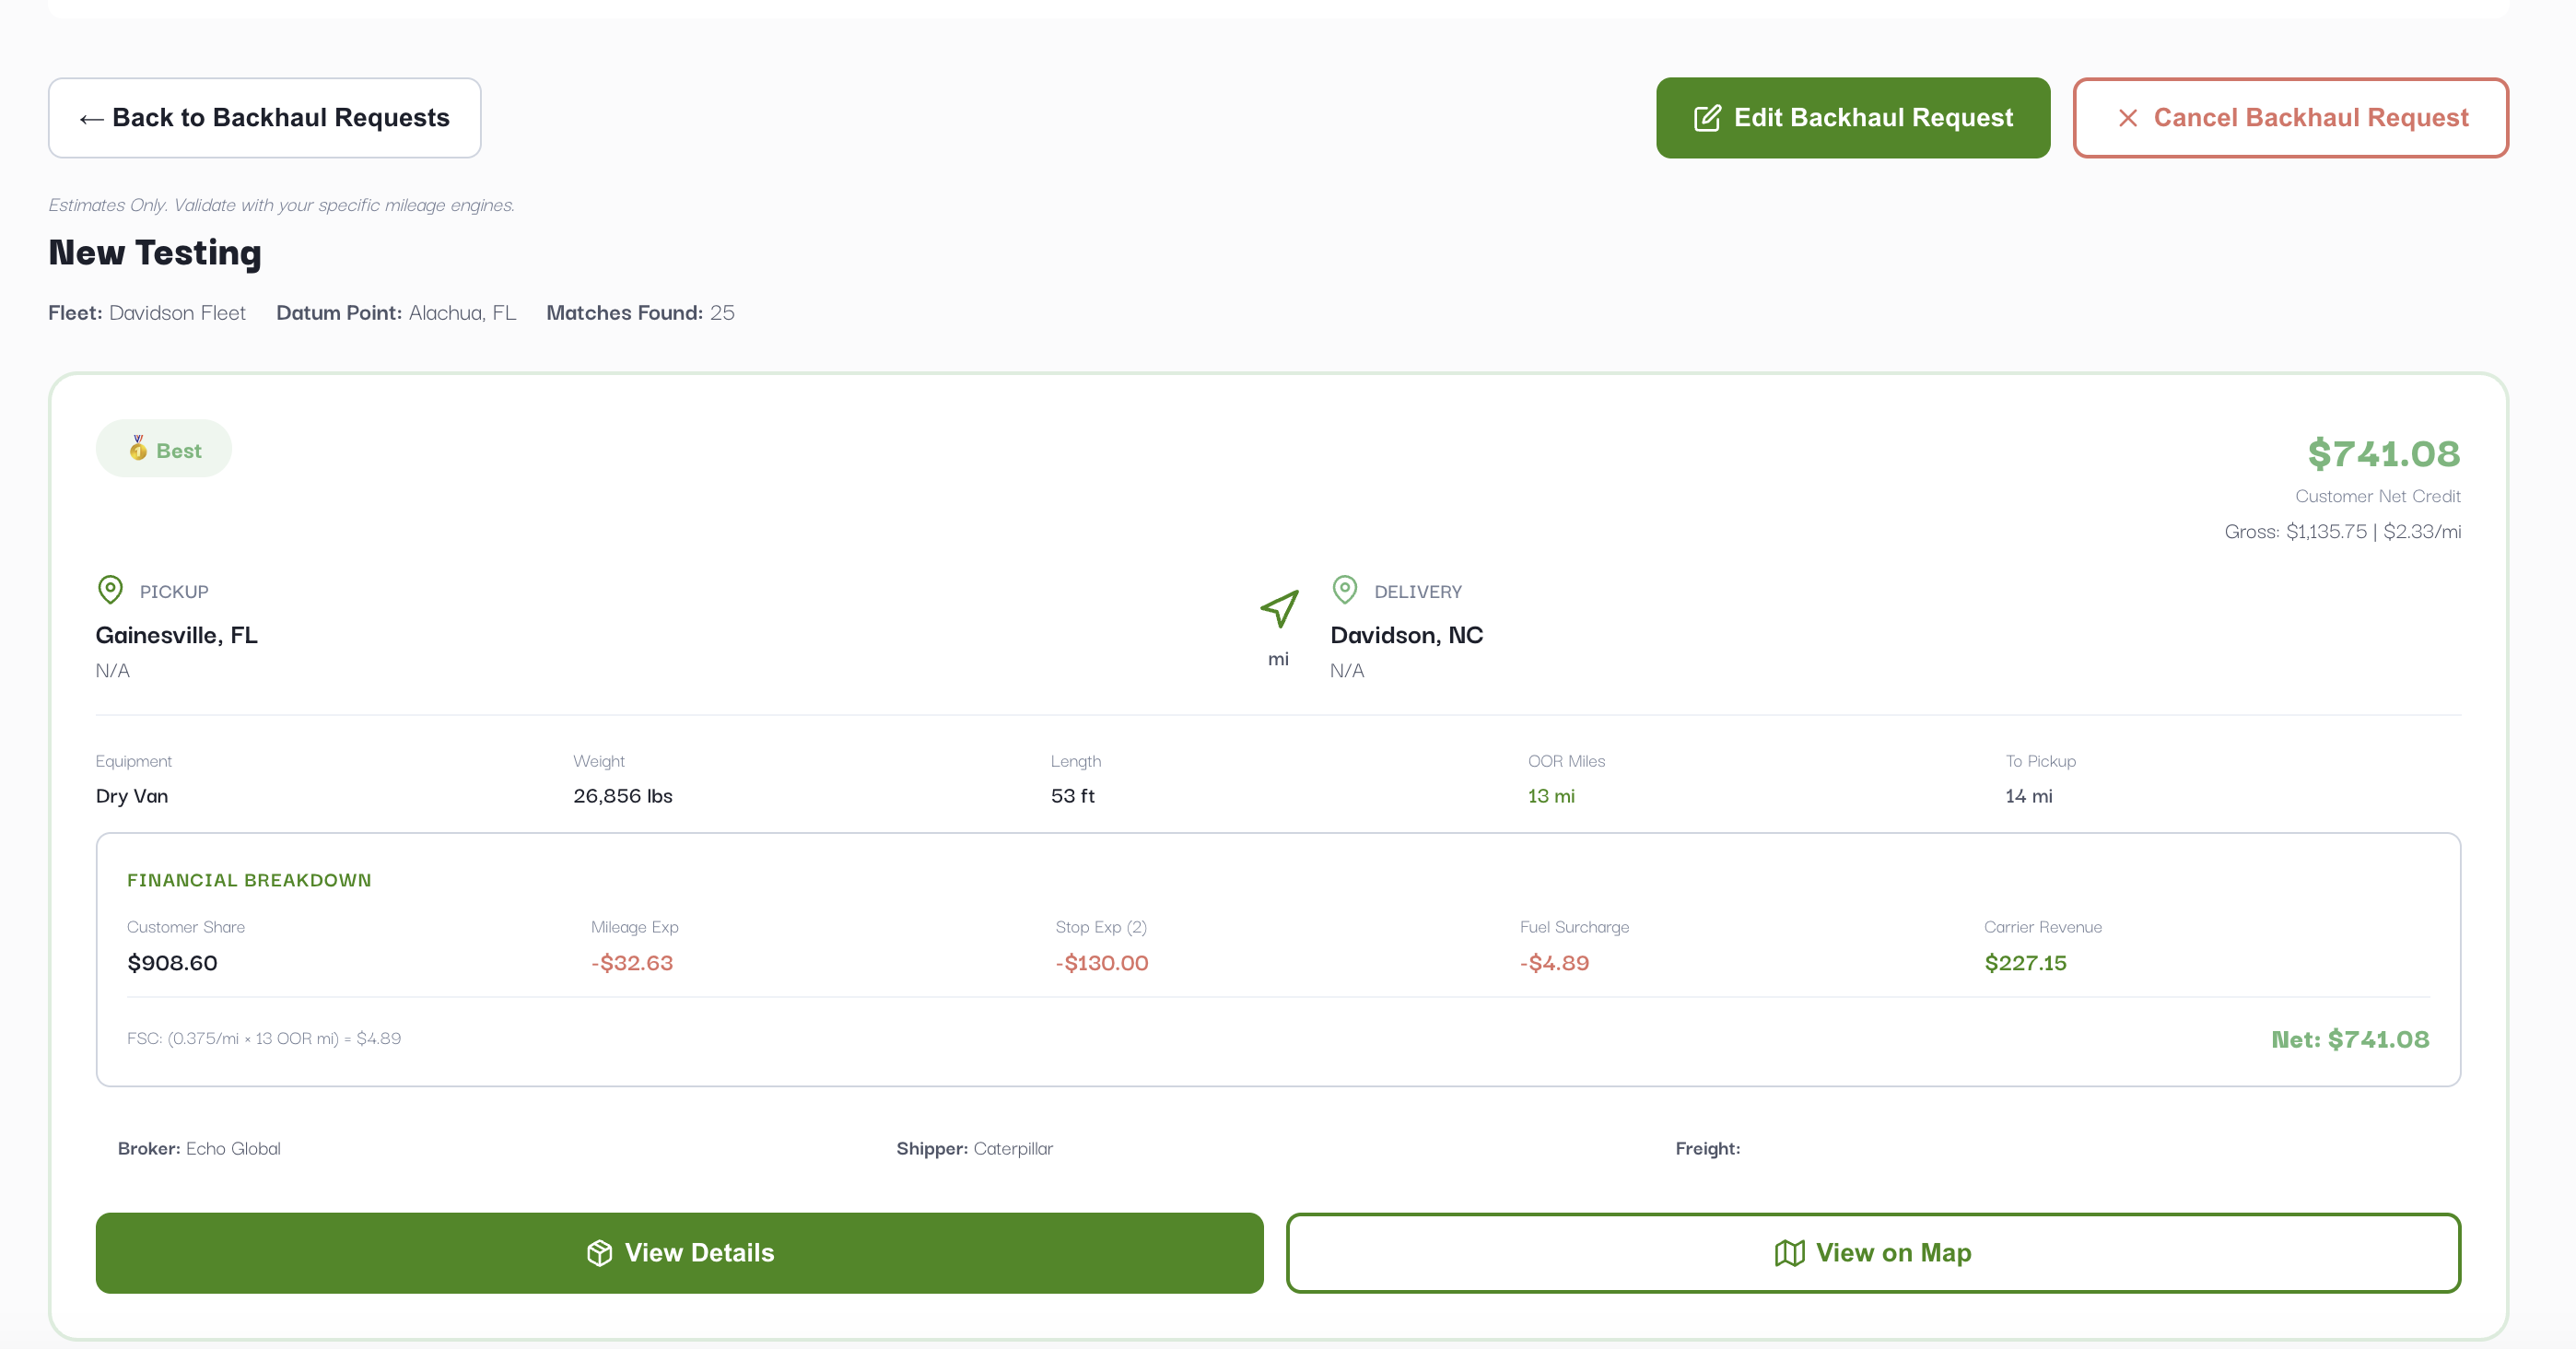
A ranked result card showing Net Credit, the equipment and mileage row, the financial breakdown, broker contact details and the Contacting Broker button
Customer Net Credit
Bottom-line benefit per load: carrier revenue share minus all OOR costs
Gross / $/mi
Total gross revenue from the load and revenue per mile
OOR Miles
Out-of-route miles added versus driving straight home
Empty → Pickup
Miles from your empty location to the load's pickup location

Above the list you'll find Equipment Filters and, where the loads carry enough description, Freight Filters — both visible beneath the map in the screenshot earlier in this step. This is the “narrow later” half of how equipment types work: the search casts a wide net, and these suggested filters let you cut it down to what you actually want to see today.

Equipment Filters
A fixed list of trailer types, showing only the ones present in these results with a count each. Your fleet's own equipment is pre-selected, so a Flatbed fleet lands on flatbed work first and can tick Step Deck or Lowboy back on when it wants the wider board. Loads posted as “flatbed or step deck” count toward both, because either trailer can take them — so nothing hides behind a combination.
Freight Filters
Commodity and handling terms drawn from the loads' own notes — Tarps, Steel, Lumber, Hazmat and so on. Only some boards publish this text, so the heading tells you how many of your results have any: “from 62 of 112 loads that carry freight notes.”
💡 Filtering terms reflect what is in front of you, so they change with every search. One only appears when at least two loads share it — a filter matching a single load tells you nothing you can't already see — and one matching every load is hidden too, since selecting it would change nothing. When there is genuinely nothing to narrow, the row says so: “No filters for this search — all 24 loads are Reefer.”
⚠️ Loads with no freight notes always show. Two of the four boards publish no description at all, so a freight chip keeps them rather than hiding them — otherwise ticking Tarps would silently erase an entire source, which would read as “that board has no tarp freight” when we simply don't know. That is why a chip reading 2 can return far more than two loads, and why the loads that genuinely matched carry a small blue badge naming the term. No badge means the load came through on the “we don't know” rule, not because it matched.
⚠️ Results are estimates only. Always validate mileage figures with your own routing engine before committing to a load.
💡 Use Run Search in the header bar at any time to re-run the search against current load data. If auto-refresh is enabled, it will also run automatically on your chosen schedule.

6
Load Details & Sharing

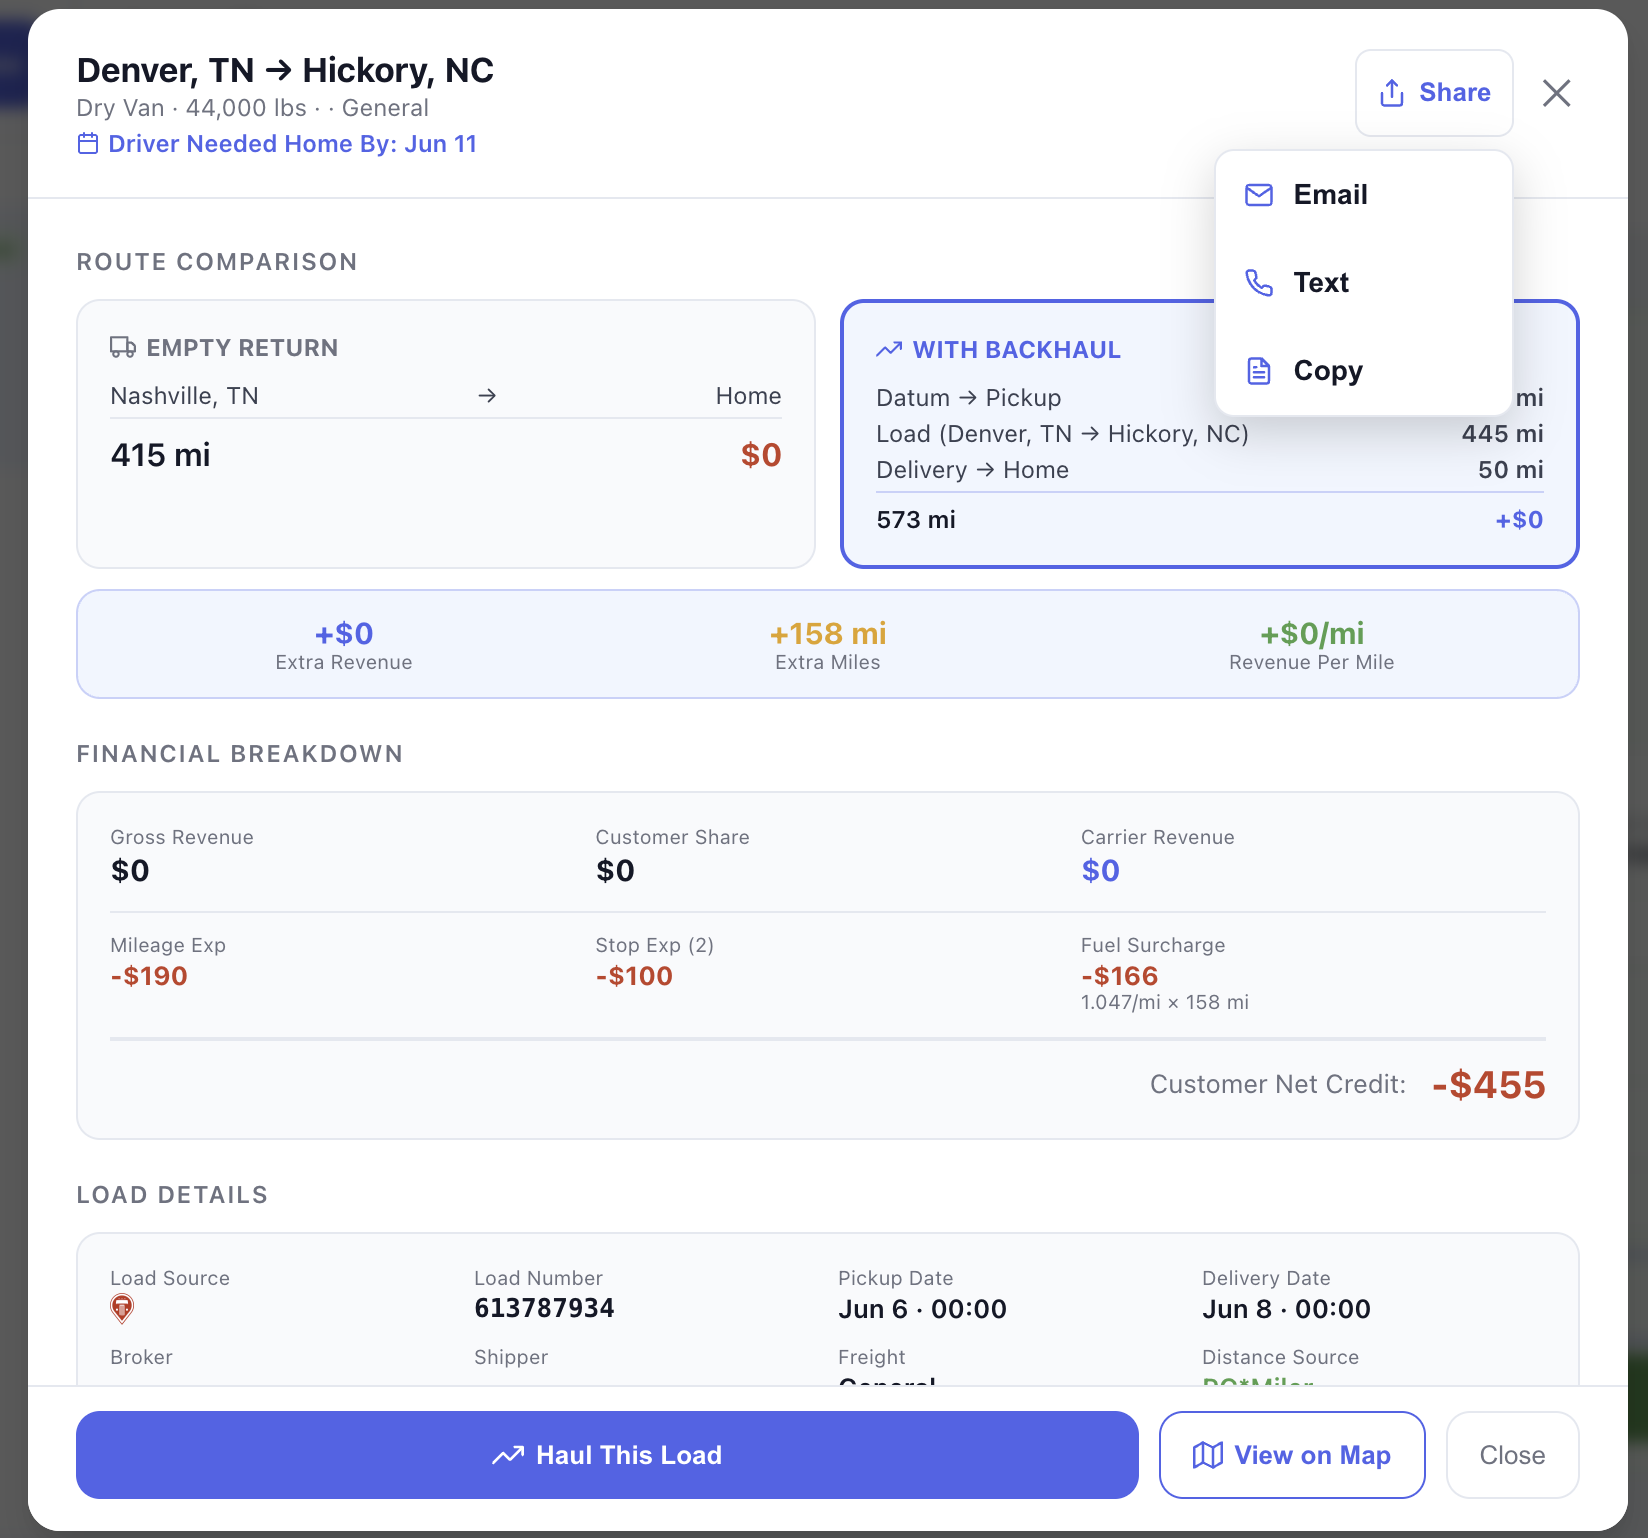
Click View Details on any load to open the full breakdown — route comparison versus an empty return, the complete financial picture, and broker contact information. If you set a Driver Needed Home By date, it's shown right in the header.

Use the Share button in the dialog header to send the load to anyone:

Email
Enter one recipient and an optional note. The email includes the full load details and a map of the route; replies come straight back to your email address.
Text
Enter a US mobile number and a short note. Sends a compact summary by SMS (no map).
Copy
Copies the full load summary to your clipboard — paste it into any channel of your own and edit before sending.
Load detail dialog with the Share menu open showing Email, Text, and Copy options
⚠️ Cancelling a request asks for a reason. Choose OPERATIONS DECLINED when operations passes on a viable load — Haul Monitor records the top load's revenue at that moment and totals what was passed on in Reports (see Section 5).
7
Work a Load: Contacting Broker → Booked → Hauled

Booking freight takes a few days and more than one phone call, so Haul Monitor follows the load through three states rather than asking you to declare the outcome up front. You only ever press the button that matches what has actually happened.

Contacting Broker
Press this when you reach out about a load — it moves to Working and is saved automatically, so it survives the next search even if it drops out of the results. Clicking Call, Text or Email, or simply copying the broker’s number off the card, counts as contacting them and does the same thing.
Booked this load
Press this once the broker confirms. The load moves to Booked, its revenue and out-of-route miles are recorded, and it starts feeding Reports and Green Stats. Booked loads leave the Saved tab — they are committed freight now, not a shortlist.
Confirm hauled
The last word on whether the truck actually ran. You can press it in the app, or just answer the follow-up email (below).

When you book, you choose whether to keep searching for something better or close the request out. Completed requests move to History, tucked out of your active list but always available.

📧 The follow-up email. A few days after you book, Haul Monitor emails to ask whether the load was hauled. Answer straight from the message — Yes, we hauled it, No, we didn’t, or Ask me later — without signing in. Each answer opens a one-question page with a single confirm button; nothing is recorded until you press it, so your mail scanner cannot answer on your behalf. “Ask me later” comes back in three days.
⚠️ Saying a booked load wasn’t hauled reverses it in full — revenue, net revenue and out-of-route miles come back out of your Reports. This is worth answering honestly: it is what keeps your numbers true.
💡 Your active list stays clean automatically — completed, cancelled, and expired requests move to History. Click Show inactive (or the History section) to see them any time.
8
Manage Loads & Remove One That Falls Through

Every load you have touched appears on the Loads screen with its status and financials. Saved holds your shortlist and anything currently Working; Booked holds committed freight. Click View on any of them for the full picture, including the load number to quote when you ring the broker back, and separate Broker and Source columns so you can see who the freight is with and which board it came from.

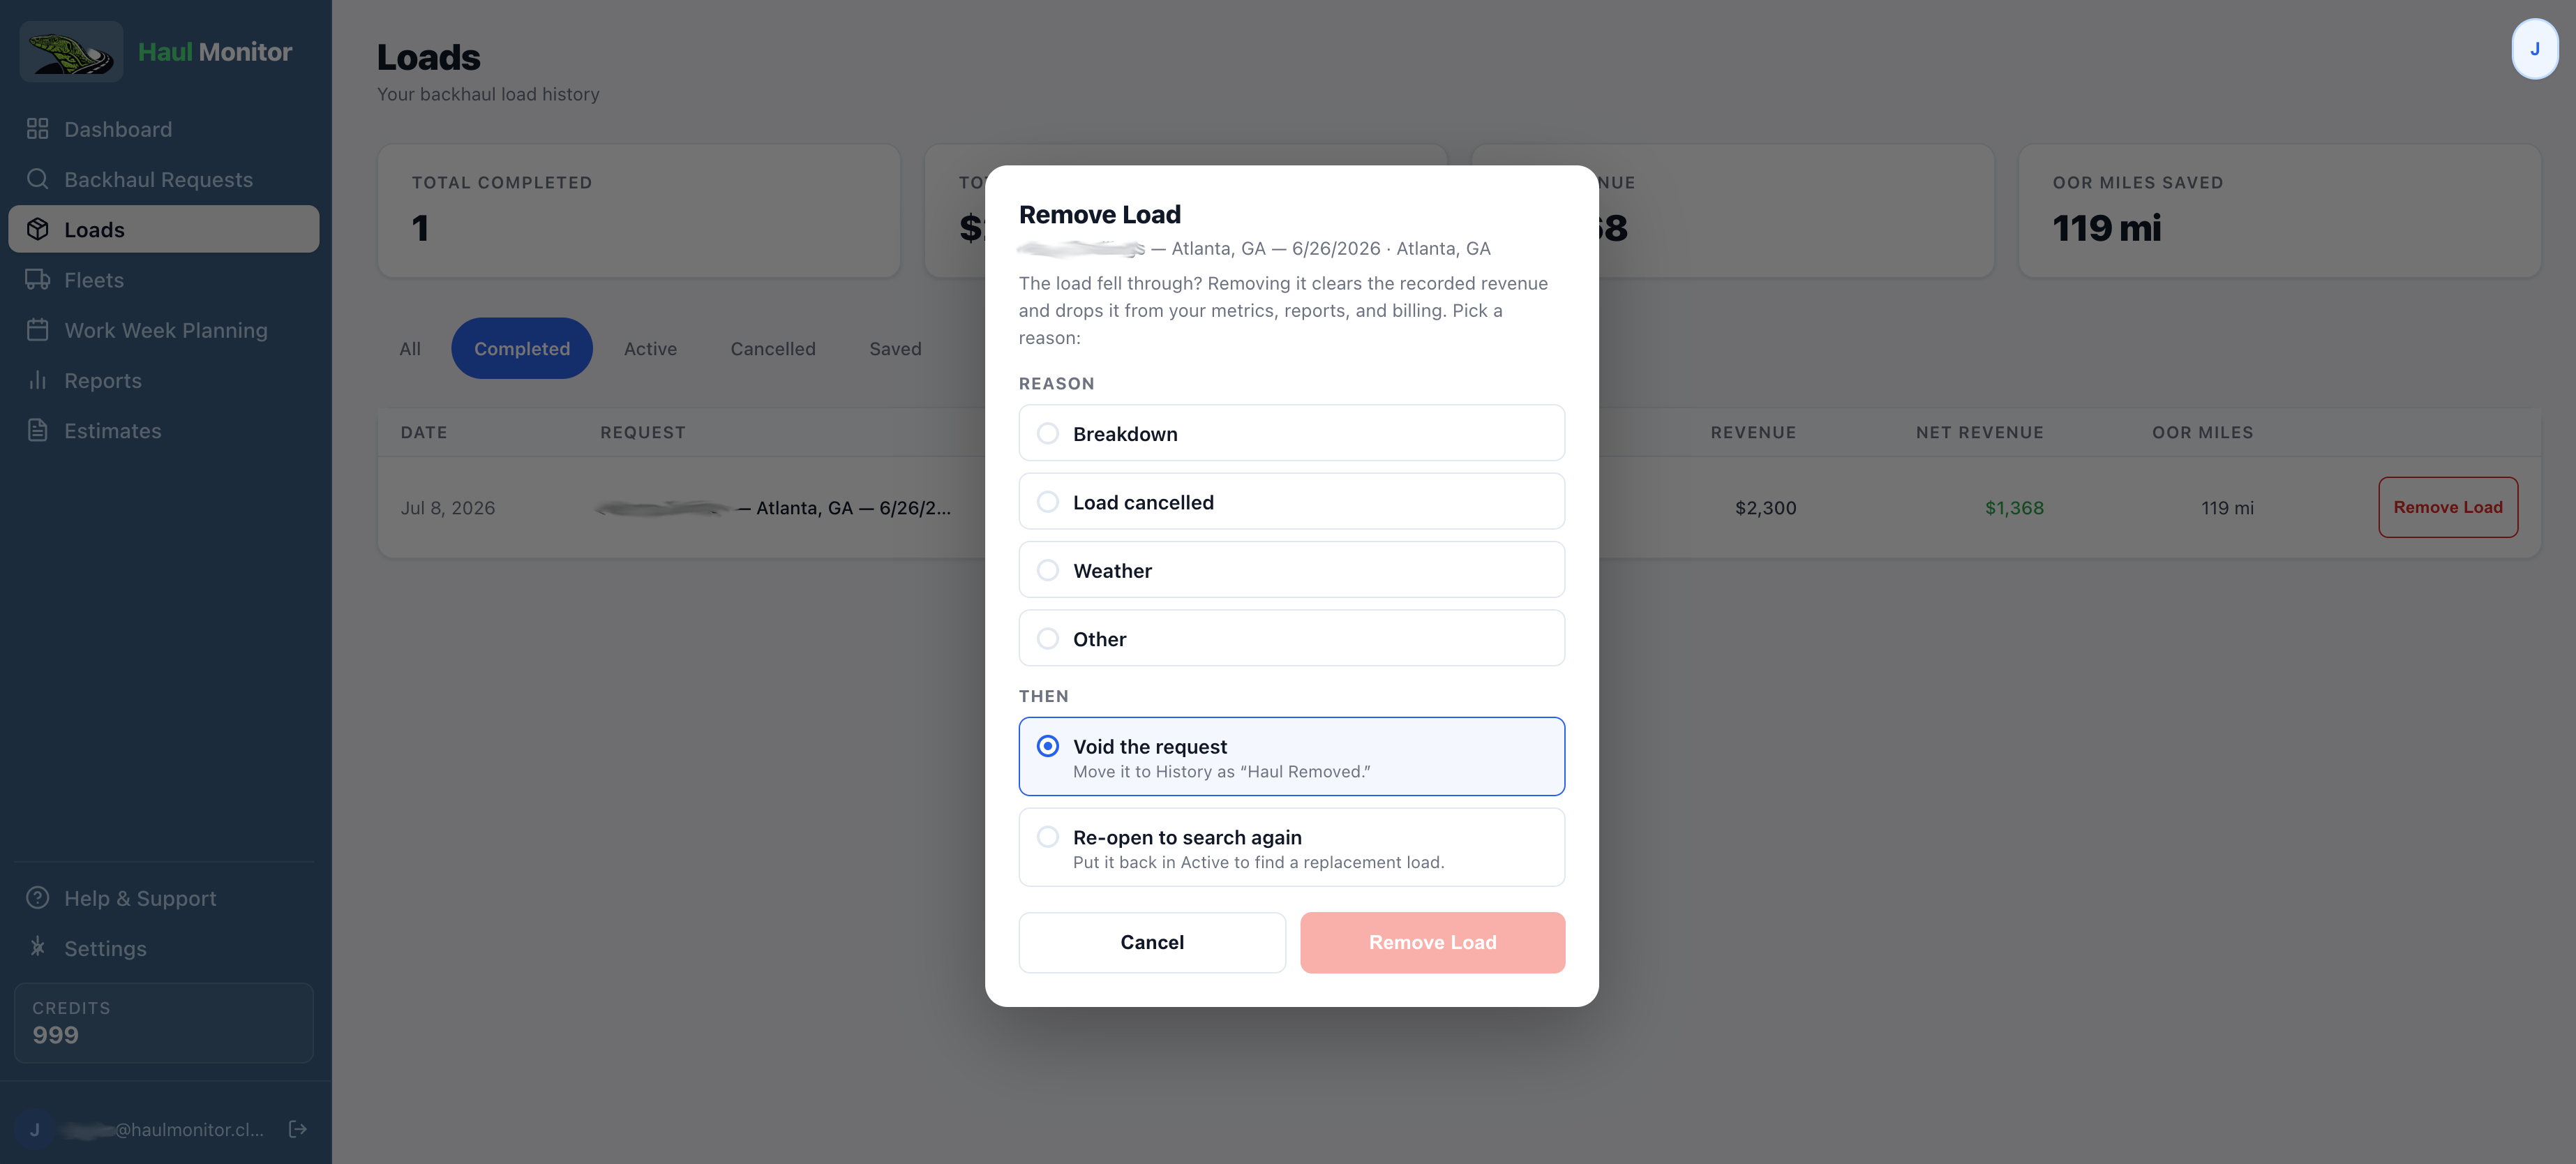
If a load falls through after you booked it — breakdown, cancellation, weather — open the Booked tab, click Remove Load, choose a reason, and confirm.

Removing a load clears it from your metrics, Reports, and billing. You choose what happens to the request: Re-open it to search for a replacement, or Void it to History (badged Haul Removed).

Loads screen Booked tab with the Remove Load dialog showing reason options and Re-open vs Void
Connecting Your Load Sources

Haul Monitor searches the load boards and brokers you connect — it does not hold any freight of its own. Until at least one source is connected, a search has nothing to look through and will always come back empty. Connecting a source is what turns everything you set up in the previous sections into actual results.

1
Check your connection status

A single coloured dot sits in the top-right of every screen, next to your avatar. It tells you at a glance whether your load sources are working:

🟢 Green
Everything you've set up is working. You have at least one connected source and nothing needs attention.
🟡 Yellow
A source you previously connected has lapsed and needs reconnecting. This happens periodically — load board logins expire or get revoked, and it is silent unless you look. Your searches still run, but they return fewer loads.
🔴 Red
No load source is connected. Searches will come back empty until you connect one.

Hover the dot for a per-source breakdown, or click it to go straight to Settings → Integrations.

2
Choose your sources

Go to Settings → Integrations. Sources come in two kinds, and they are different products to a carrier:

Load Boards
Truckstop, 123Loadboard and Direct Freight each search thousands of brokers' posted freight. You bring your own subscription — connect the accounts you already pay for. Truckstop is set up once for your whole organization with an Integration ID; 123Loadboard and Direct Freight connect per user with your own login.
Brokers By arrangement
A broker-direct connection shows that brokerage's own freight — loads no board carries. These are free to carriers but enabled per organization once a carrier relationship is in place, so there is nothing for an individual user to connect.
💡
Connecting more than one source is worth it. Each board carries freight the others don't, so a second connection widens what a search can find rather than duplicating it.
3
Connect the account

Click Connect on a source and follow its prompt — a redirect to sign in and authorize, or a field for your account credentials or Integration ID. Once saved, the dot turns green and your next search will include that source.

⚠️
Don't have an account with any load board yet? Each source in Settings links out to sign up. You need an active subscription with the board itself — Haul Monitor searches on your behalf using your account, it does not resell access.
4
If your organization manages connections for you

Truckstop and broker-direct connections are set up at the organization level, so if you are not an org admin you'll see their status but no Connect button. The status dot still reflects what your searches can reach — if it's red or yellow and you can't act on it, contact your org admin.

Creating an Estimate Request

An Estimate Request is a planning and proposal tool. Instead of searching for a specific live load, it projects the annual financial value of backhaul opportunities along a given route — useful for customer proposals, pricing negotiations, and fleet planning. The output is a formatted report you can print or save as a PDF.

1
Open the Estimate Request Form

From the navigation menu select Estimates and click New.

2
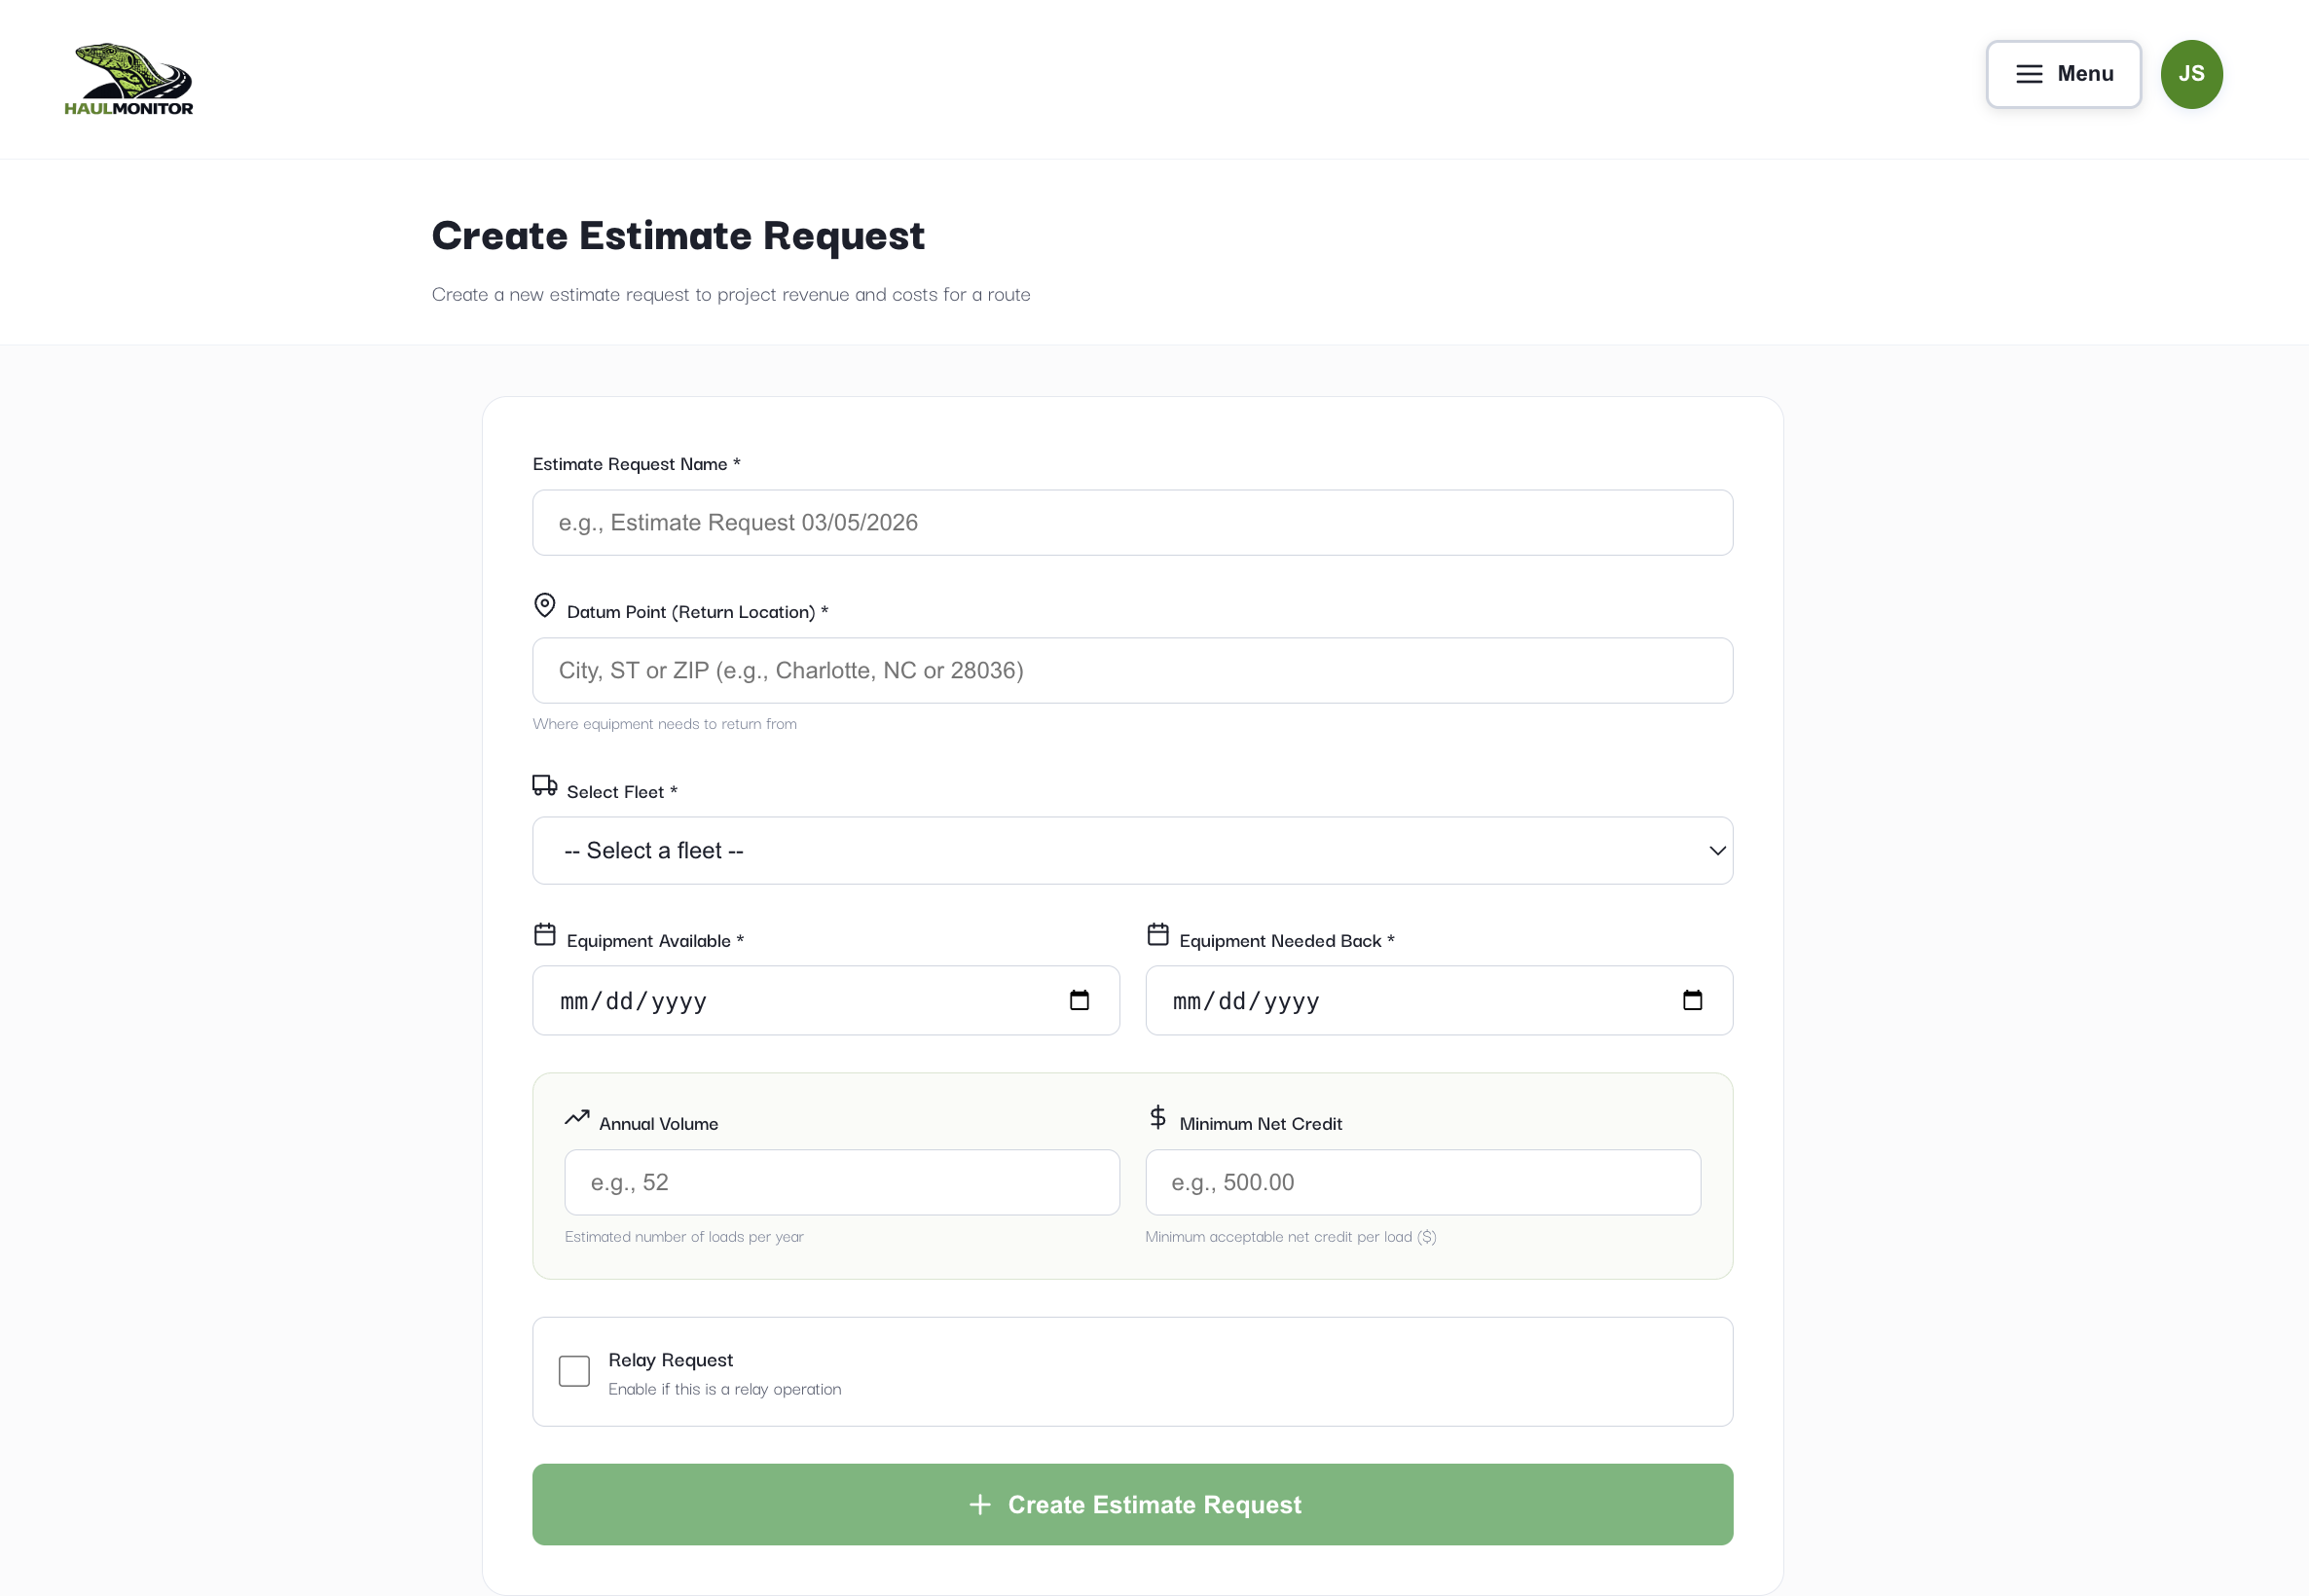
Fill in the Request Details
Request Name *
A descriptive label for this estimate (e.g., Estimate Request 03/05/2026)
Empty City, ST *
The starting location for the return route. Enter city/state or ZIP (e.g., Charlotte, NC or 28036).
Fleet *
The fleet whose rate config will be used for all financial calculations
Start Date *
Start of the date range to analyze for available loads. An estimate searches the whole Start → End window (not a single day), so a wider range surfaces more opportunities.
End Date *
End of the analysis date range. As with backhaul requests, once this date is fully in the past the estimate is marked Inactive; edit the dates forward to run it again.
Est. Loads Per Year
Expected loads per year. Used to project annual revenue totals on the report (e.g., 52 for weekly, 120 for roughly weekly with some weeks doubled).
Min Net Credit Per Load $
Only opportunities at or above this net credit per load are included in the report averages. Prevents low-value or negative loads from skewing results (e.g., $50 or $100).
Estimate form showing Request Name, Empty City, ST, Fleet, date fields, Est. Loads Per Year, Min Net Credit Per Load, and Save Estimate button
3
Relay Mode (Optional)

Enable Relay mode if the backhaul will be run by a relay driver. In relay mode, mileage is calculated as the relay driver's full round trip (home → pickup → delivery → home minus the deadhead), giving a more accurate cost picture for relay operations.

4
Submit and View the Report

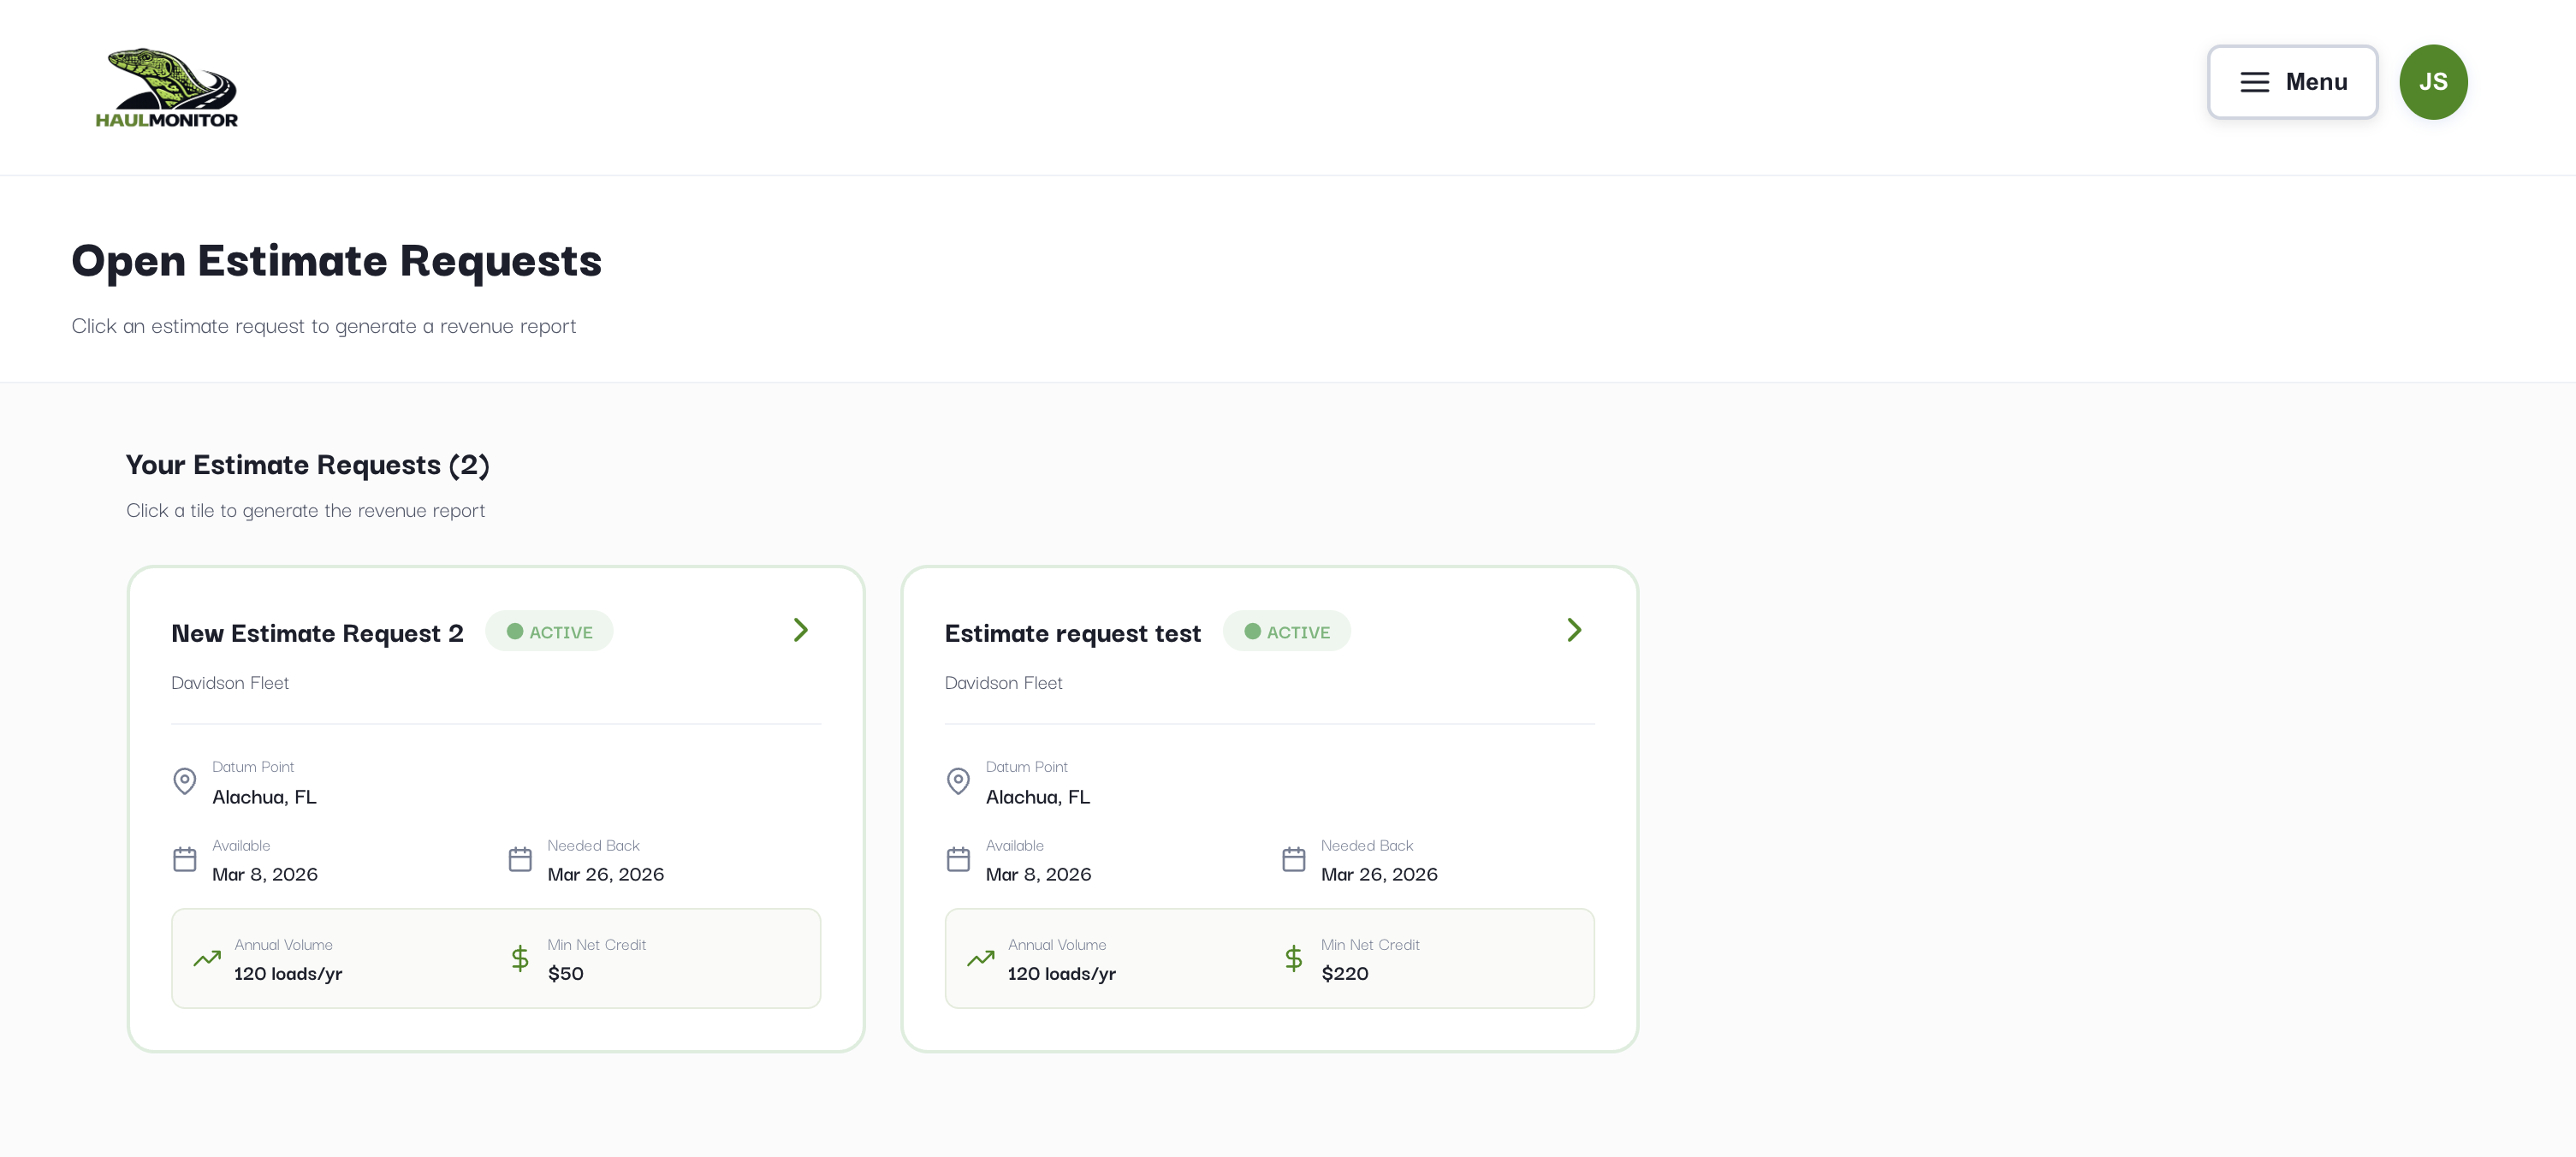
Click Save Estimate. Haul Monitor finds matching opportunities and generates the report. It's saved in your Estimates list under Active — click any card to open it.

Estimates list showing Active estimate cards with empty location, dates, loads per year, and min net credit
5
Reading the Estimate Report

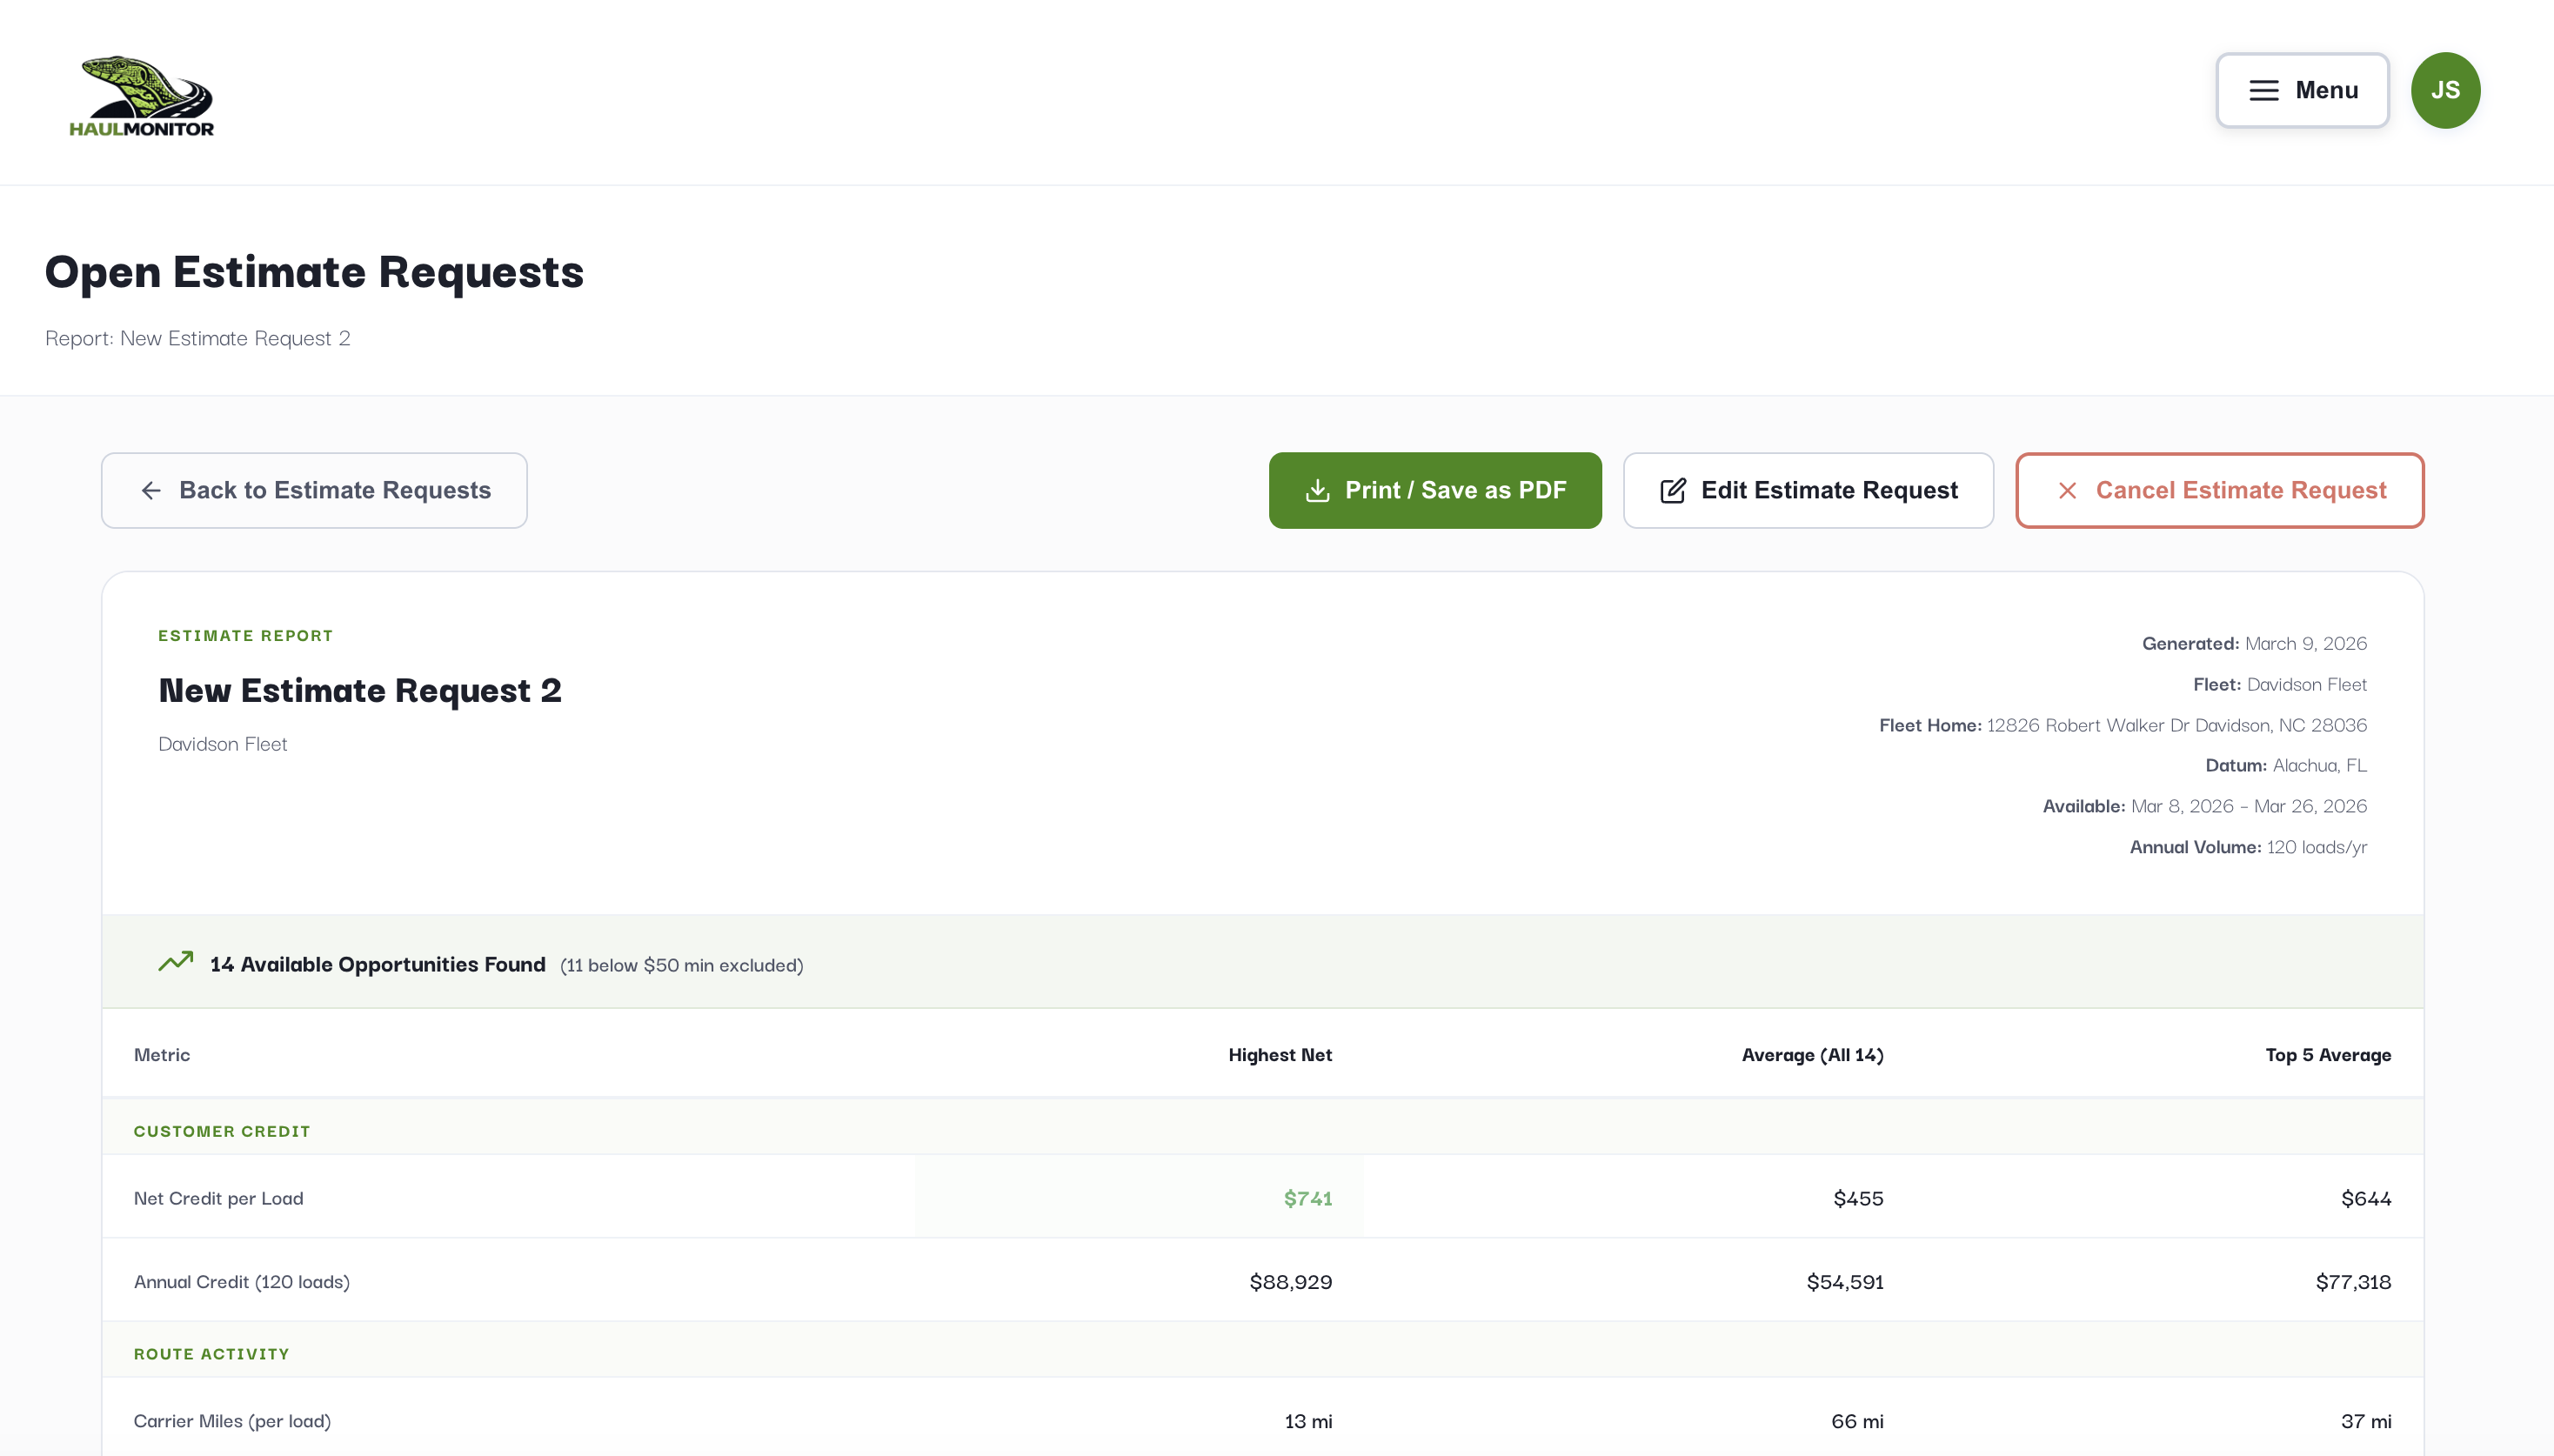
The report shows three columns — Highest Net, Average (All), and Top 5 Average — across four metric groups. Only opportunities meeting your Minimum Net Credit threshold are included.

Estimate Report top half showing header metadata, opportunity count with exclusion note, and Customer Credit / Route Activity rows
Customer Credit
Net Credit per Load
Bottom-line credit per load: carrier revenue share minus all OOR costs (miles, stops, FSC). Highlighted green on the best opportunity.
Annual Credit
Net Credit × Annual Volume — total projected yearly benefit to the customer
Route Activity
Carrier Miles (per load)
Out-of-route miles added per load versus driving straight home
Total Annual Mileage Add
Total additional miles driven across the full annual volume
Stops Added (per load)
Extra stops added per load — typically 2 (one pickup, one delivery)
Carrier Annual Revenue Components
Backhaul % Split
Annual revenue from your carrier percentage of gross load revenue
OOR Miles
Annual cost of out-of-route miles (miles × mileage rate × volume)
OOR Stops
Annual cost of additional stops (stops × stop rate × volume)
OOR Fuel Surcharge
Annual FSC on out-of-route miles (FSC rate × OOR miles × volume)
Total Carrier Revenue
Sum of all annual revenue components — the total financial impact of this backhaul lane
💡 Click Print / Save PDF to export the report. Use Edit to adjust dates, annual volume, or minimum net credit and regenerate at any time.
Reports & Tracking

The Reports page rolls up everything your fleets have done — completed loads, revenue earned, miles saved, and the opportunities operations chose to pass on.

1
Fleet Performance at a Glance

The headline cards show Completed Loads, Total Revenue, Net Revenue, and OOR Miles. Below them, a Green Stats panel shows the Truckload Miles Reduced and Truckload Gallons Reduced — the miles and fuel your fleet removed from the market by filling empty trucks (backhaul load miles minus out-of-route miles, converted to fuel at your MPG). Further down, the revenue trend chart covers the last six months and the status breakdown counts every request by outcome; the full request table lists each request with its revenue, net revenue, and out-of-route miles.

2
Operations Declined — Revenue Passed On

When a request is cancelled with the OPERATIONS DECLINED reason while search results are on screen, Haul Monitor snapshots the top available load's value at that moment. The Operations Declined card totals what was passed on:

Gross Revenue
Total gross value of the declined top loads
Customer Net
Net credit the customer would have received (requires a rate config; shows — without one)
Carrier Net
The carrier's revenue share of the declined loads

Each declined request is listed beneath the totals with the load's origin → destination and its figures — a clear record of the cost of saying no.

Reports page Operations Declined card showing gross, customer net, and carrier net totals with per-request rows
Co-Driver: Your AI Assistant

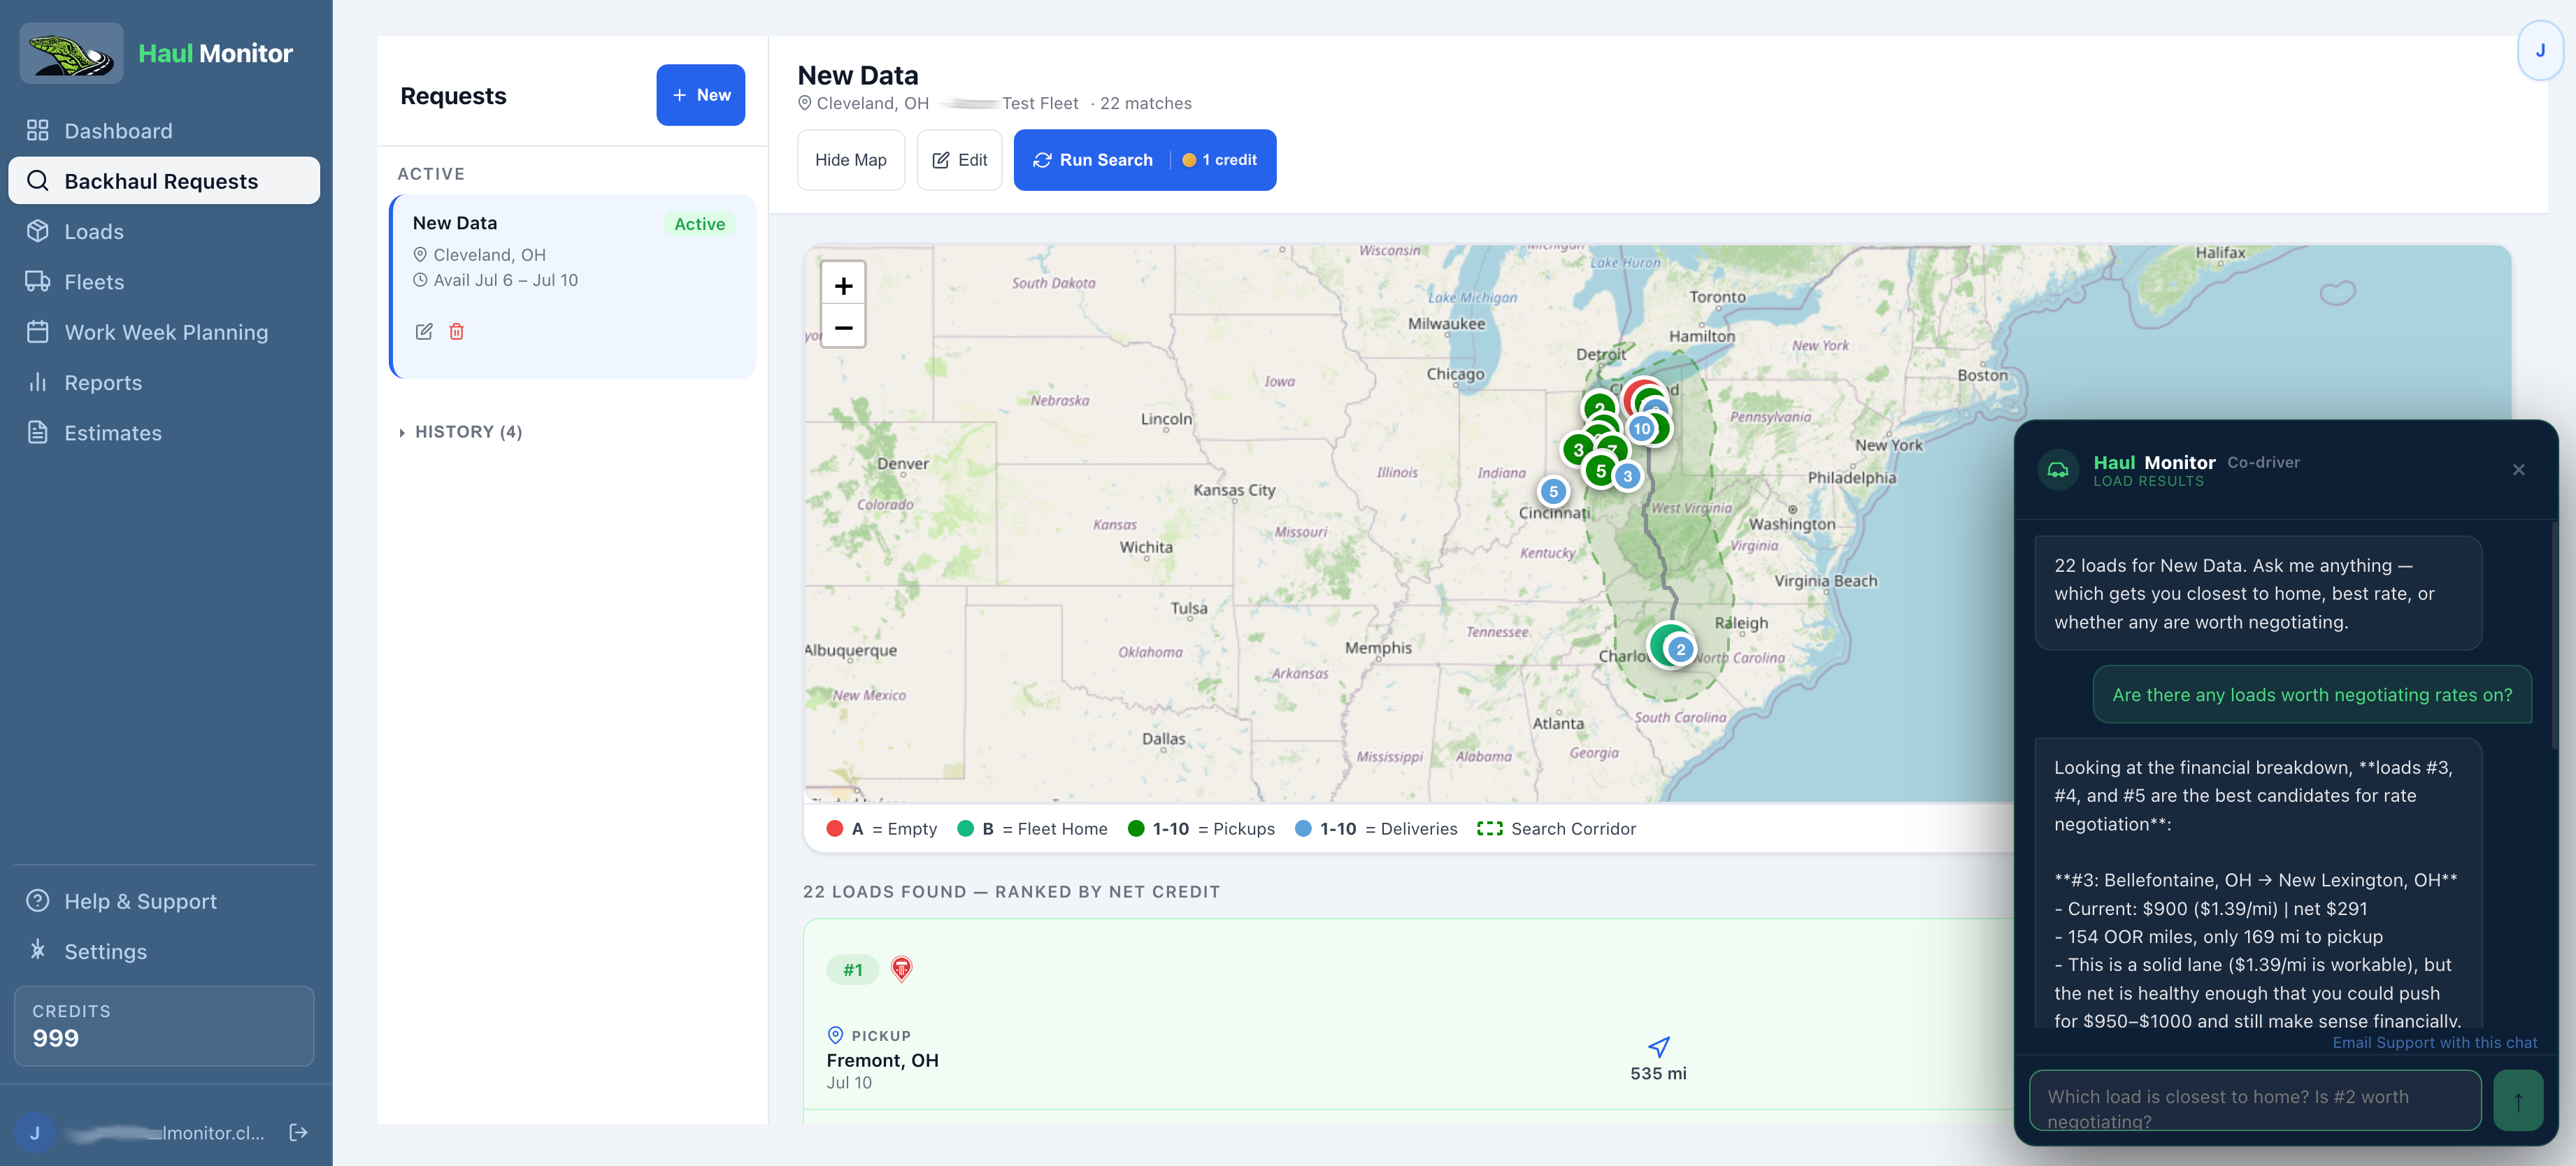
Co-Driver is Haul Monitor's built-in AI assistant. It knows what you're looking at — your dashboard, a set of results, your open requests — and answers questions about your loads, fleets, and operations in plain language. Think of it as an expert riding shotgun on every screen.

1
Open Co-Driver

Look for the green Co-Driver button in the bottom-right corner of every screen. Click it to open the chat panel. It stays out of your way until you need it.

Co-Driver chat panel open over a results page
2
Ask Anything — In Context

Co-Driver reads the screen you're on. On a results page, ask "Which load keeps me closest to home?" or "Why is this load's net revenue negative?" On the dashboard, ask it to help you set up a fleet or explain a metric. Because it has your on-screen context, the answers are specific to your data — not generic help text.

3
Get Unstuck, or Reach a Human

New to Haul Monitor or unsure how something works? Ask Co-Driver first — it's the fastest way to get moving. If you still need a person, use Email Support with this chat to send the whole conversation to our team so you don't have to re-explain.

💡 Great starter questions: "Walk me through creating my first backhaul request," "What does out-of-route mean?," or "How do I read the financial breakdown?"